In actual project development and operations, I deeply realized how important it is to introduce continuous integration. After learning about continuous integration concepts and the Jenkins tool, I decided to set up the system to fill this gap and improve development efficiency. No more talking, let’s get straight to the practical content.
JAVA Installation
Jenkins is an automation server software written in JAVA, so we need to install JAVA first.
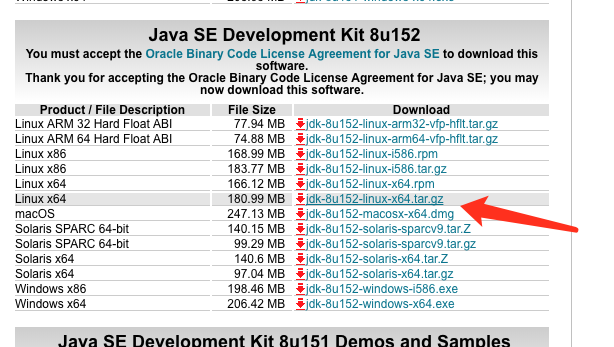
Download JDK
http://www.oracle.com/technetwork/java/javase/downloads/jdk8-downloads-2133151.html
Download the jdk-8u152-linux-x64.tar.gz package
Installation
Go to the server /usr/local, create a java folder, put the package in, and extract it
tar -zxvf jdk-8u152-linux-x64.tar.gz
Environment Variable Configuration
vi /etc/profile
JAVA_HOME=/usr/local/java/jdk1.8.0_152
CLASSPATH=.:$JAVA_HOME/lib.tools.jar
PATH=$JAVA_HOME/bin:$PATH
export JAVA_HOME CLASSPATH PATH
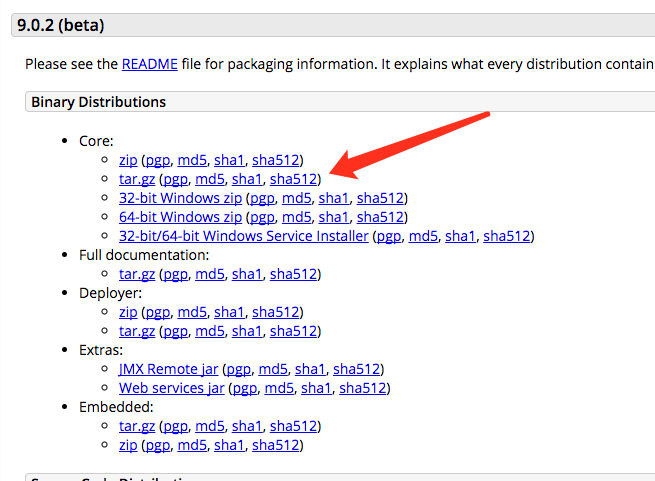
Tomcat Installation
Download the gz package, go to /usr/local, create a Tomcat folder, put the package in, and extract it
tar -xzvf apache-tomcat-9.0.2.tar.gz
Tomcat Service Configuration
Since it’s not installed through the yum package manager, it’s not yet service-ready. For actual production, it needs to be service-ready and auto-start, so we need to manually configure this.
Modify the catalina.sh file in the /usr/local/tomcat/apache-tomcat-9.0.2/bin directory, add JAVAHOME and CATALINA_HOME
Copy the file to the /etc/init.d directory and rename it to Tomcat
sudo cp /usr/local/tomcat/apache-tomcat-9.0.2/bin/catalina.sh /etc/init.d/tomcat
Auto-start
sudo chkconfig –add tomcat
Deploy Jenkins
Download WAR Package
Download address: Click here
Extract
Put the Jenkins.war package into /usr/local/tomcat/apache-tomcat-9.0.2/webapps
Restart Tomcat
service tomcat restart
WEB Access
http://192.168.1.81/jenkins/
Install Essential Plugins
Since I want to integrate with GitLab, the plugins I installed are as follows:
- Email Extension Plugin
Email functionality - GitLab Plugin
GitLab related configuration - Publish Over SSH
SSH connection to Linux servers - NodeJS Plugin
NodeJs version management
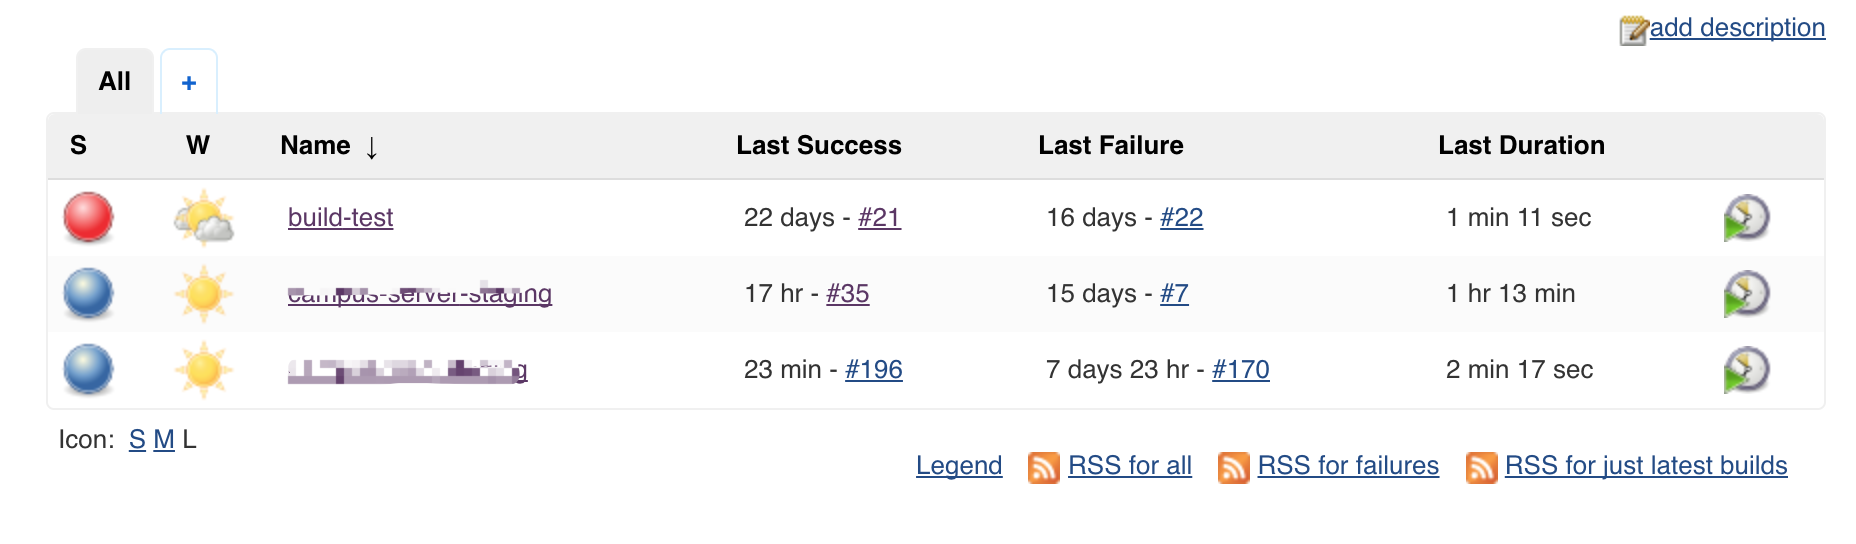
Create Jobs
Specific job configurations actually have many detailed points based on actual requirements. Here I’ll just briefly introduce my configuration.
Source Code Management
Source code management selects Git. The authentication information below is a CI account I specifically created on GitLab. Since I’m doing internal network test deployment, the build branch is the dev branch.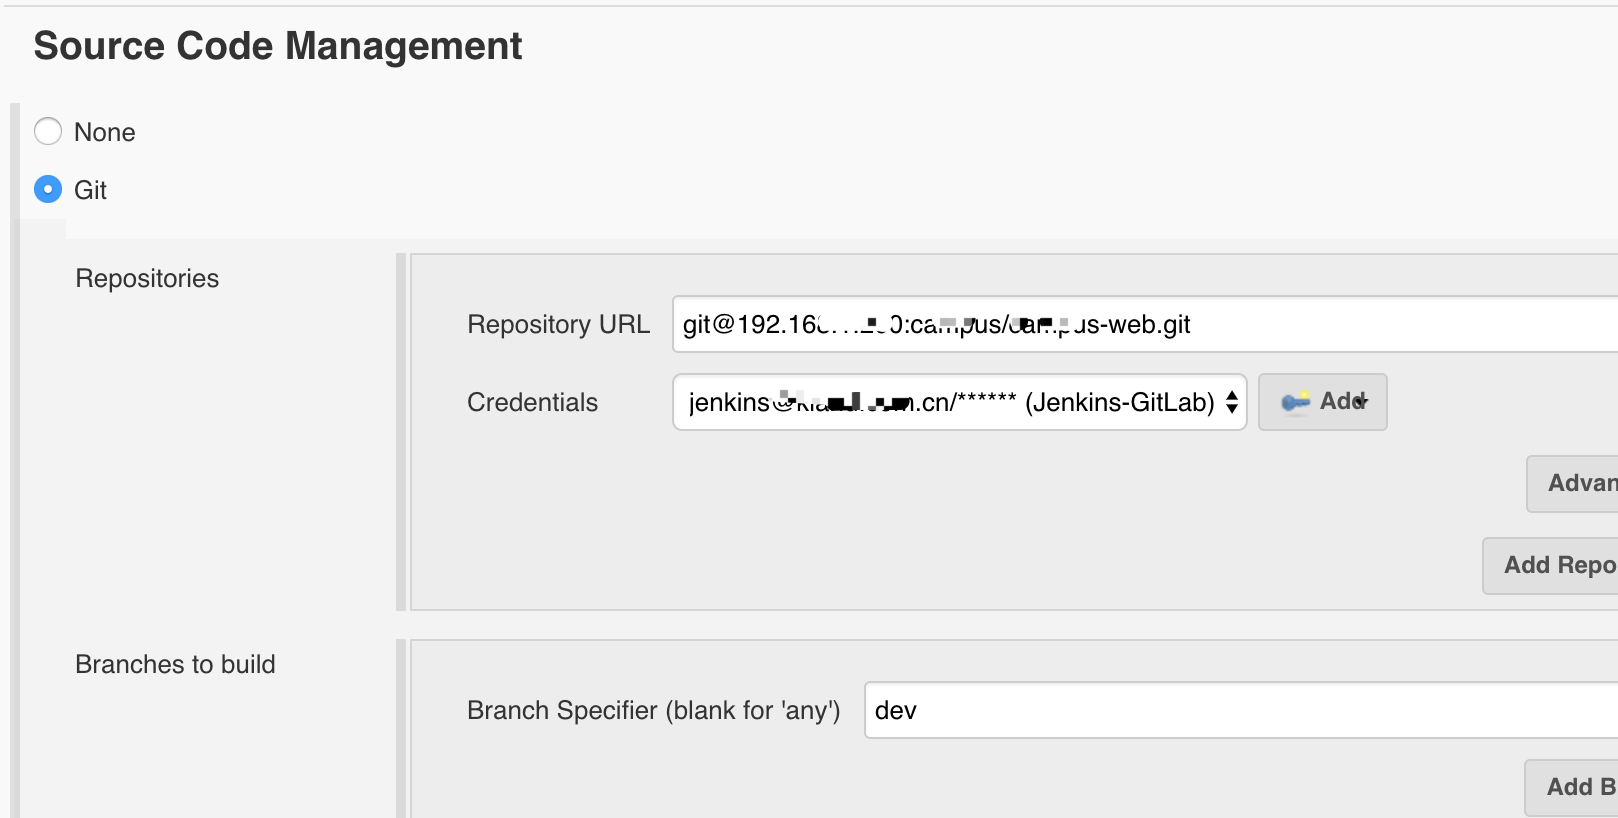
Build Triggers
Note here, I chose GitLab-push trigger build, which is GitLab’s Webhook. This address needs to be configured in the corresponding GitLab repository.
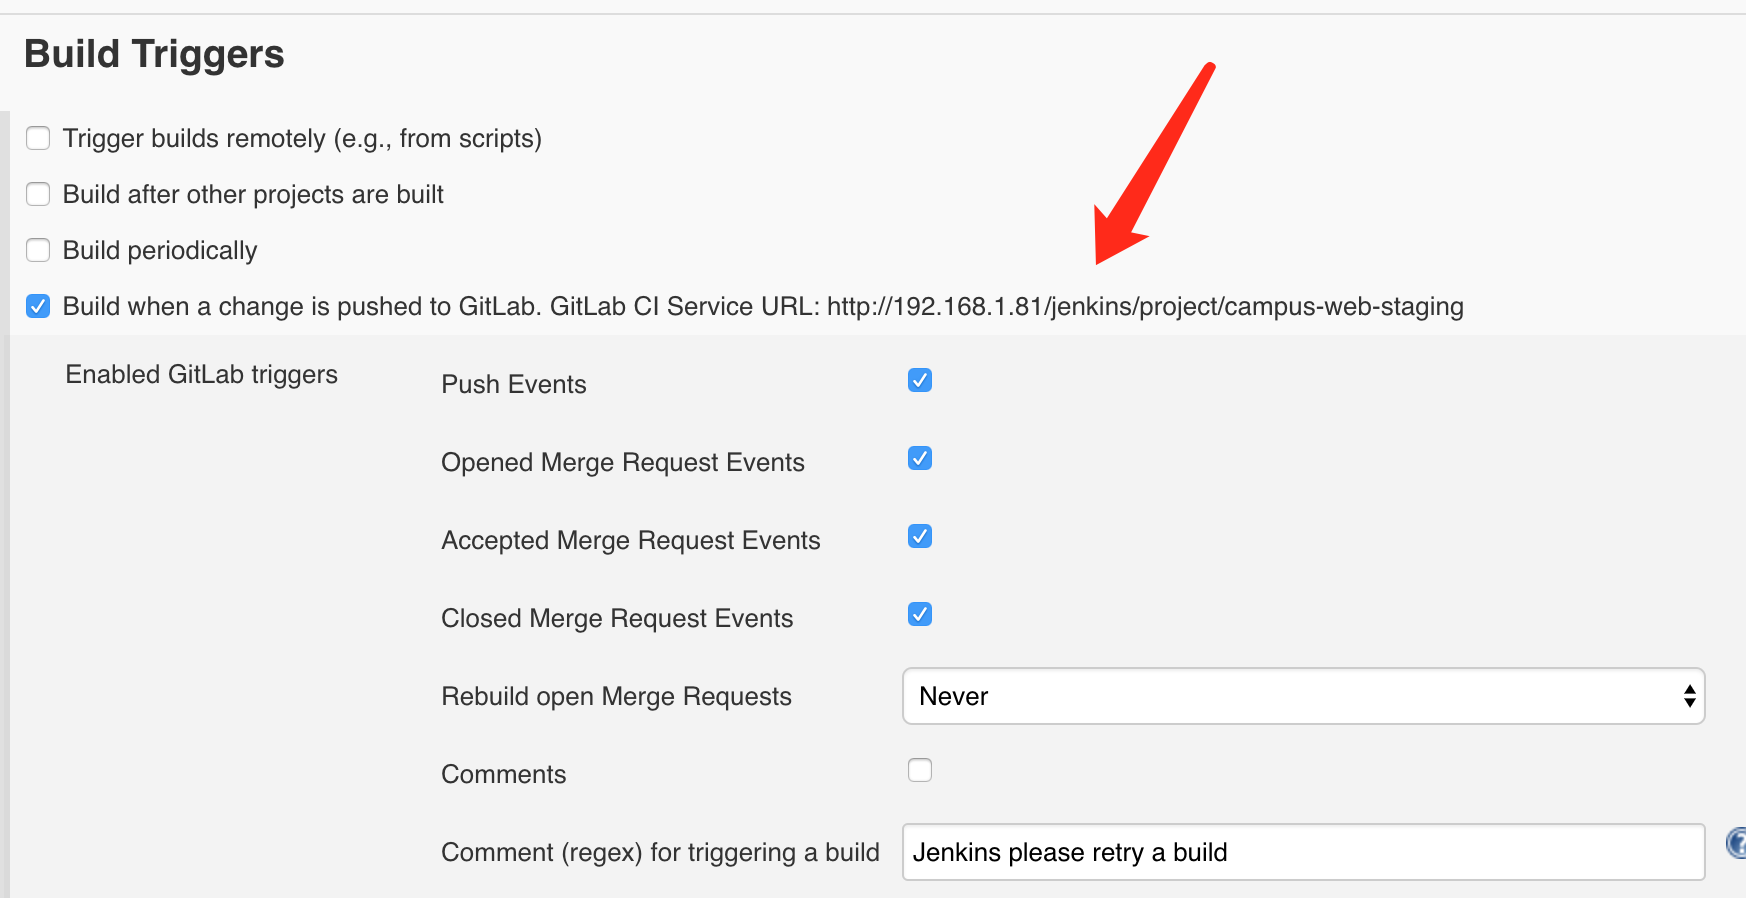
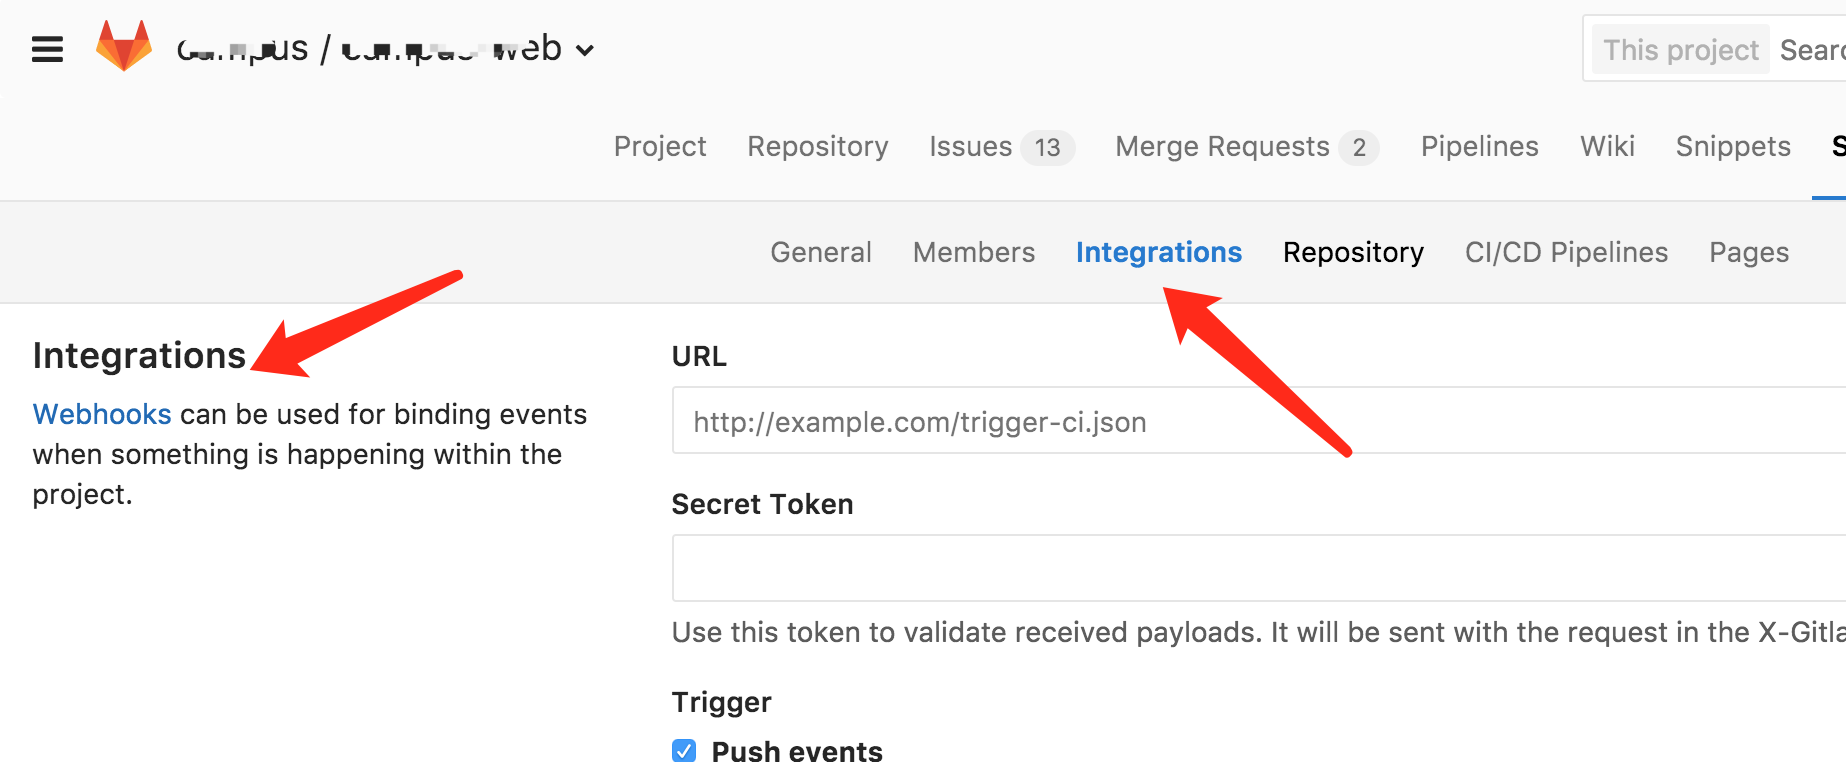
After configuring the hook, click test to confirm it’s OK

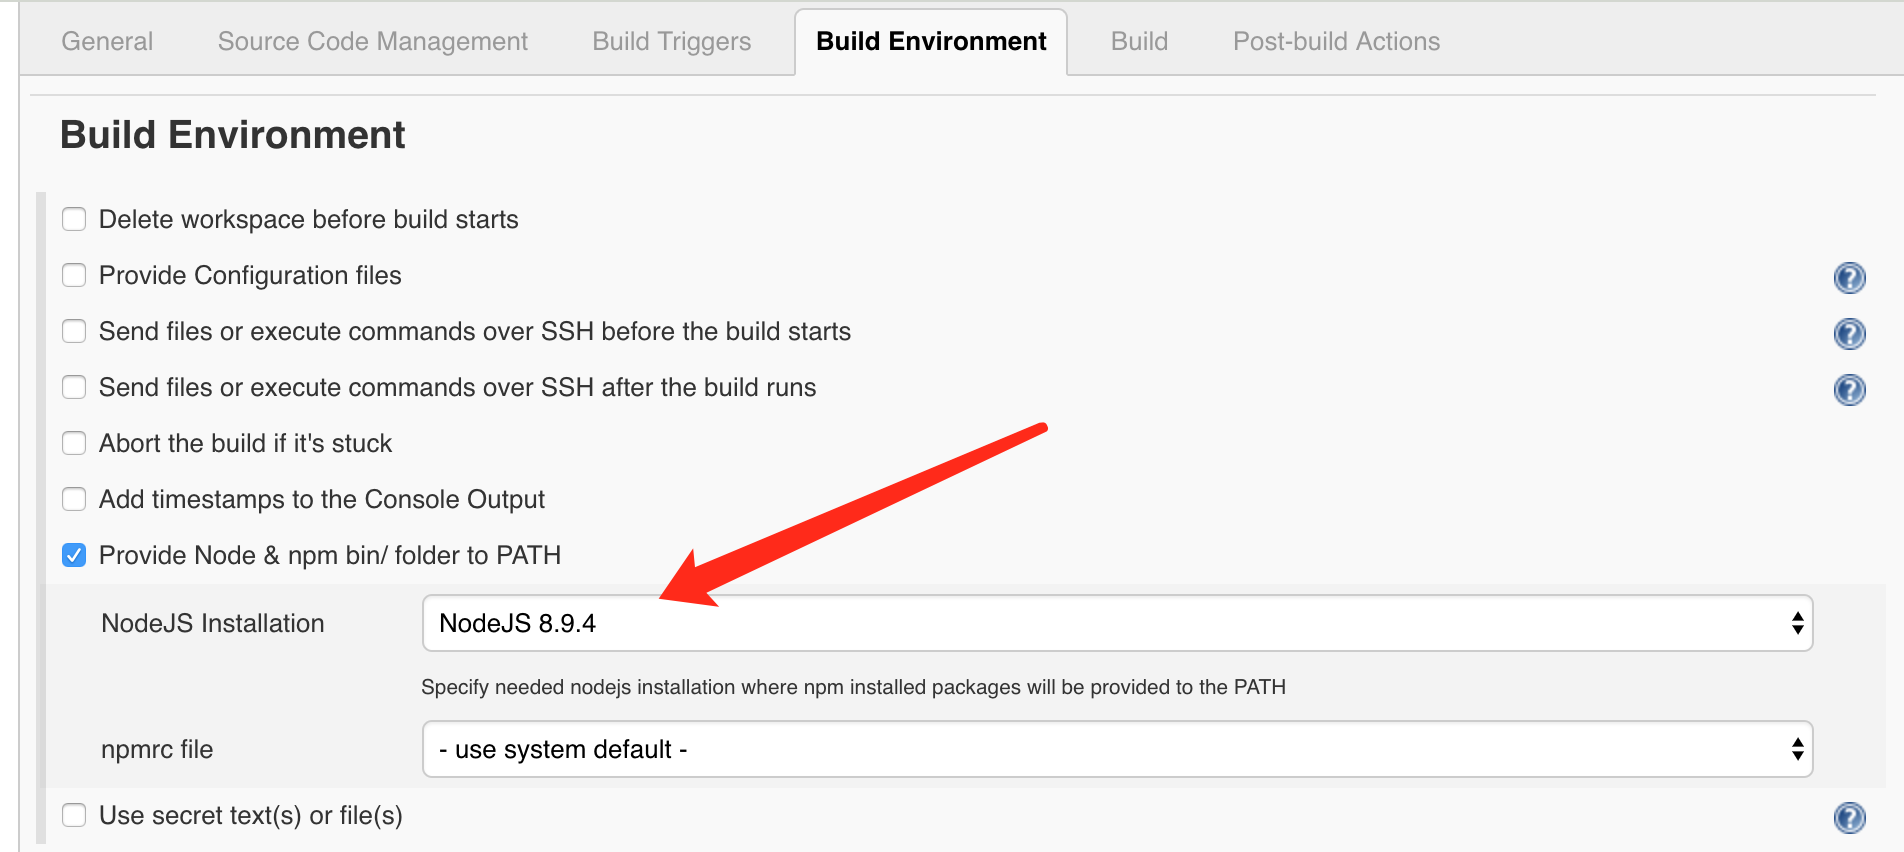
Build Environment
I’m doing frontend Node building here, so I select the required Node version
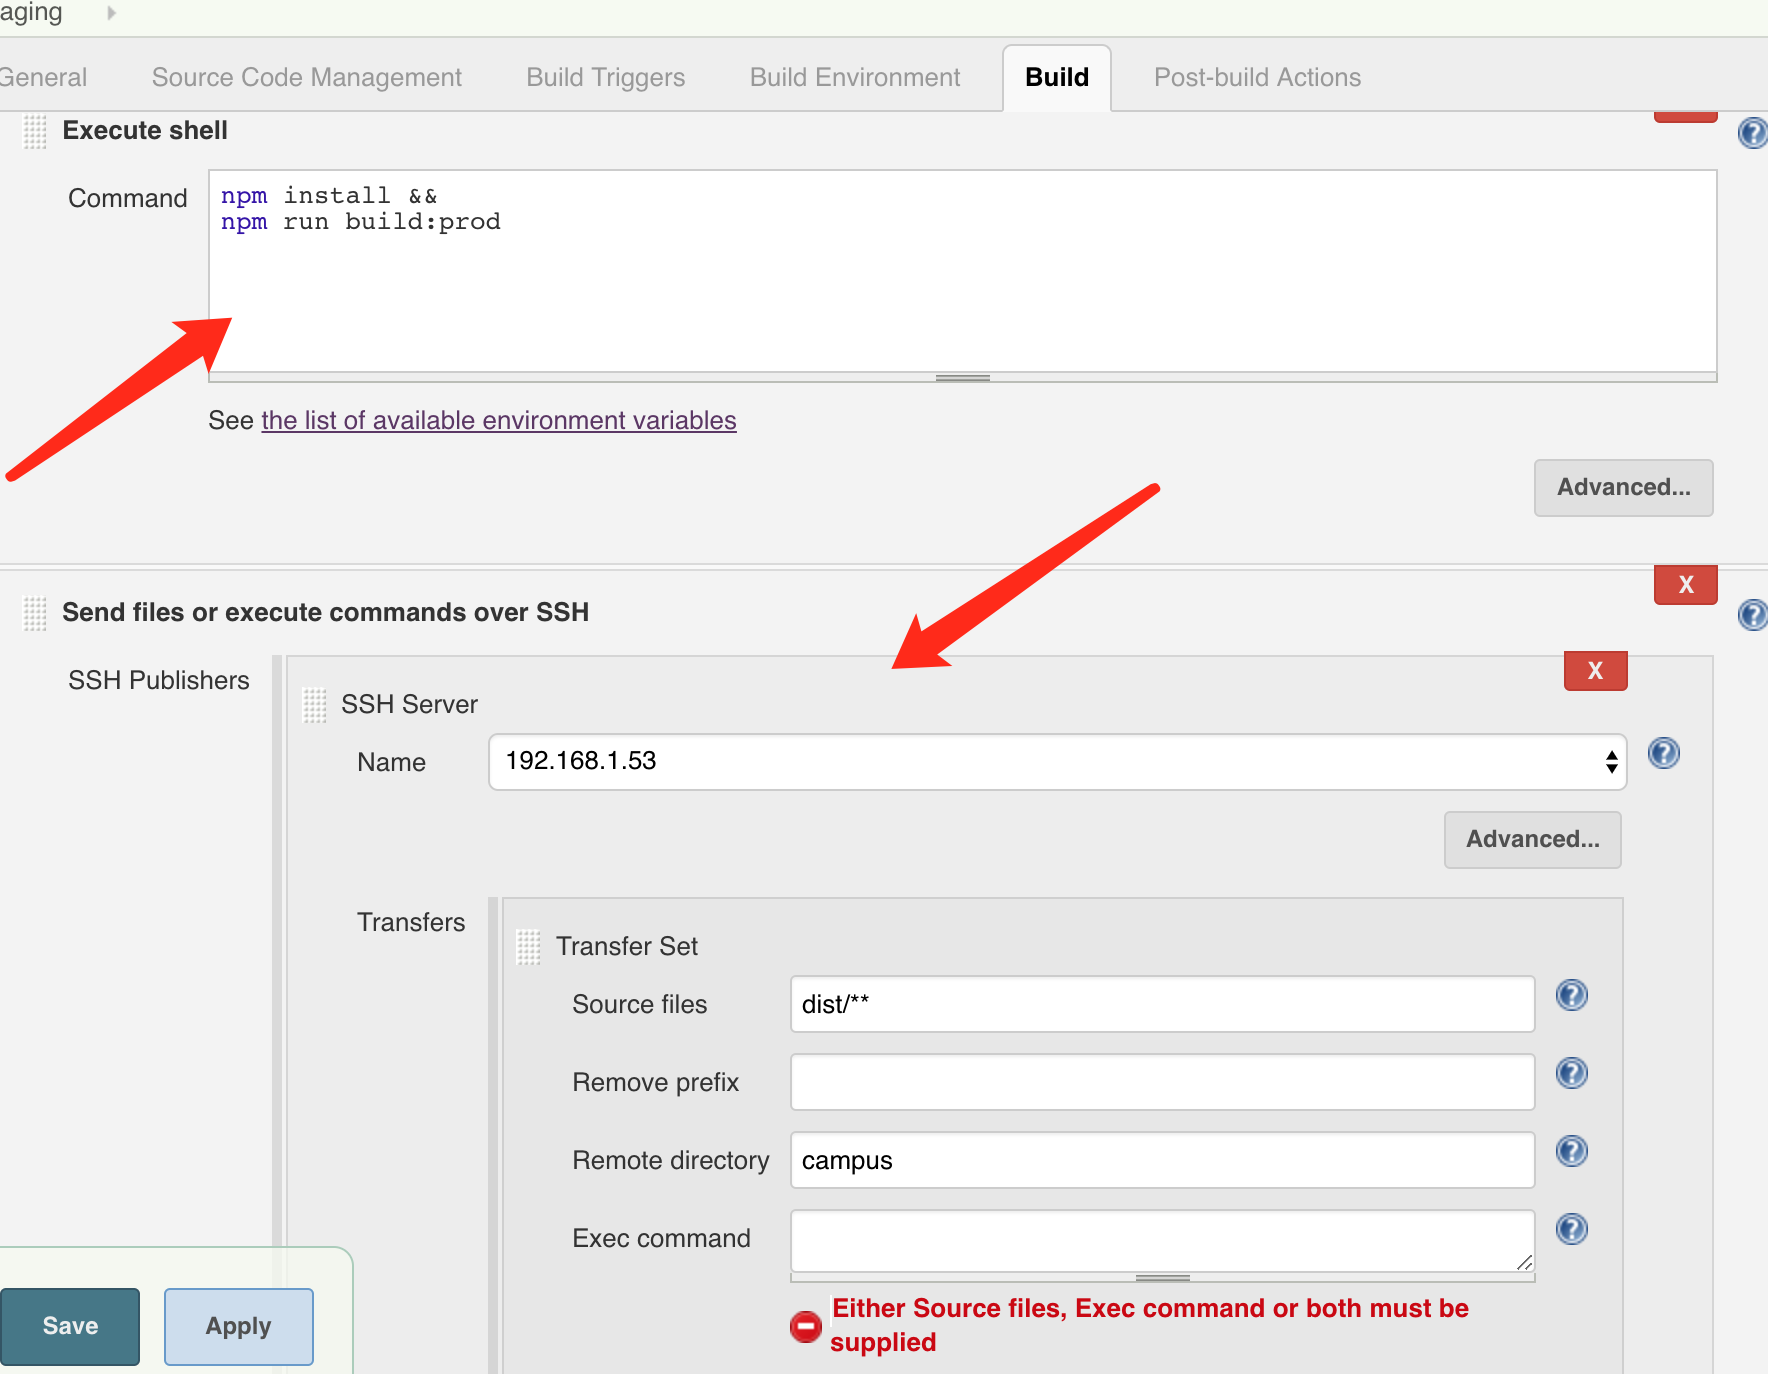
Build
Here I first execute package installation and build packaging, then transfer via SSH to the target path on the test server
Post-build
Implement email sending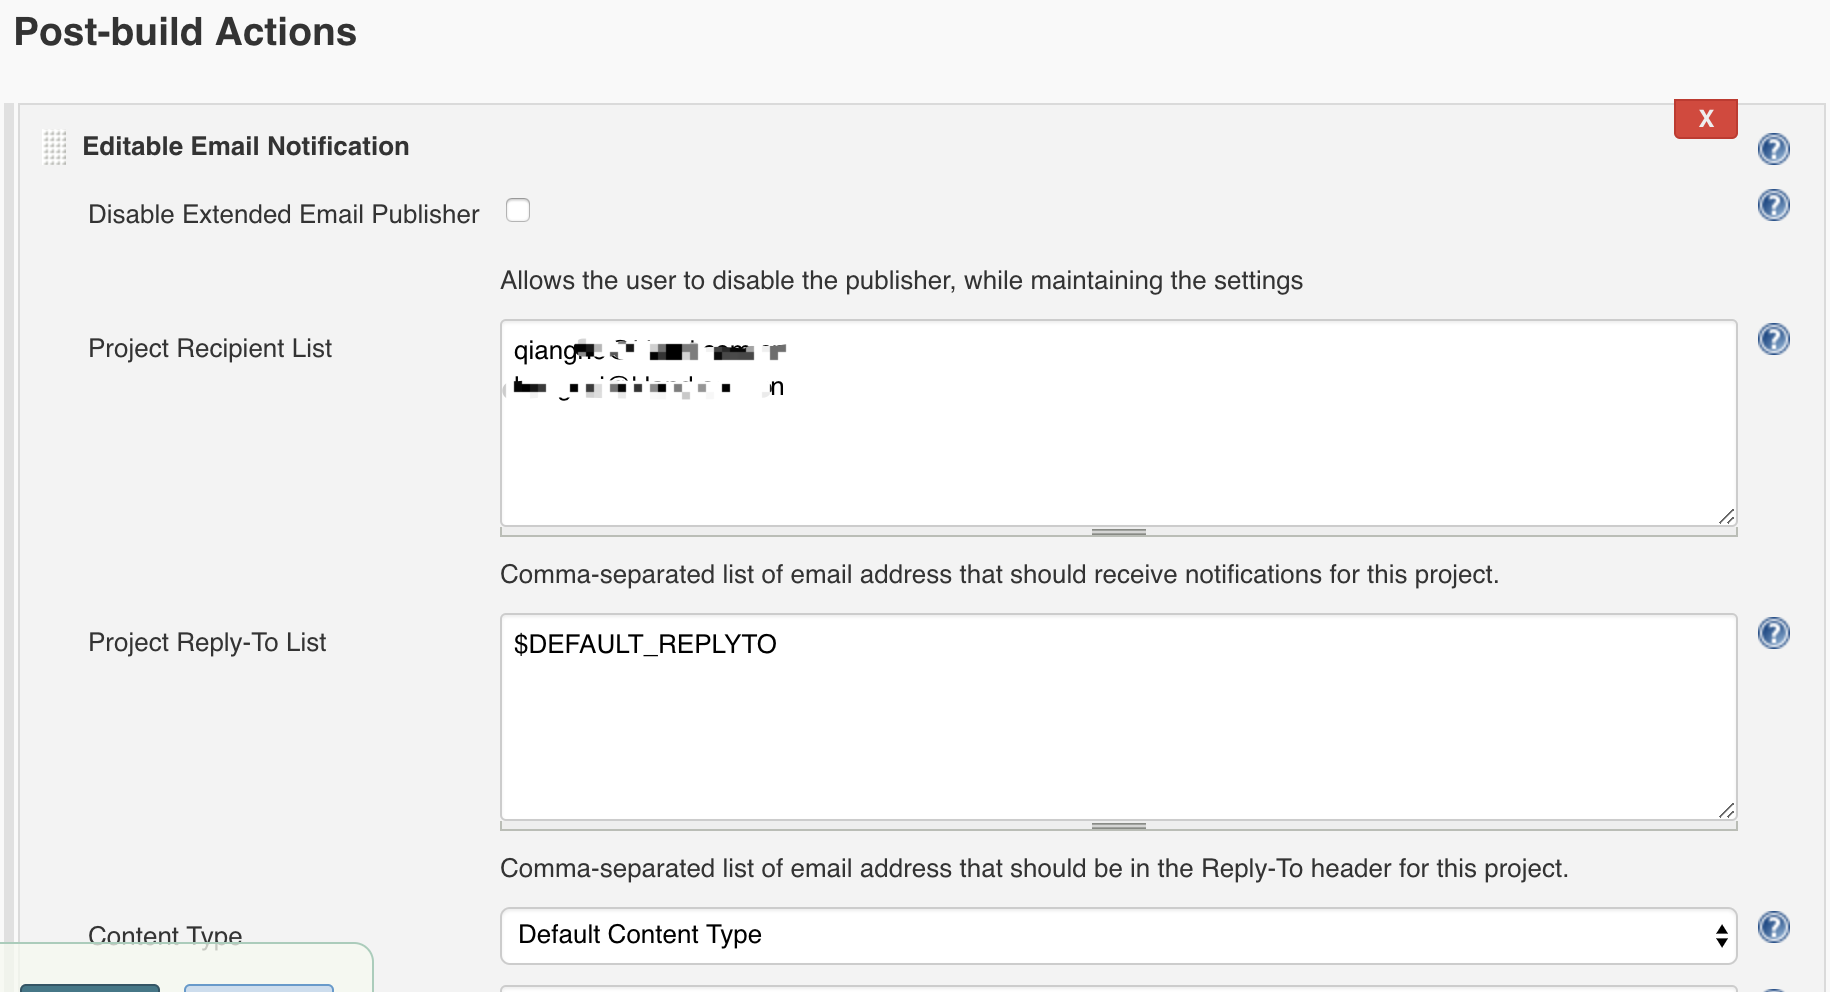
Docker Installation [Simplest Method]
The above method is more complex but beneficial for fully understanding Jenkins deployment. A more efficient deployment method is using Docker.
docker pull jenkinsci/blueocean
docker run
docker run \
  --name jenkins-blueocean \
  -d \
  -p 8080:8080 \
  -p 50000:50000 \
  -v jenkins-data:/var/jenkins_home \
  jenkinsci/blueocean
Access http://localhost:8080/login
$ docker exec -it jenkins-blueocean /bin/bash
$ cat /var/jenkins_home/secrets/initialAdminPassword
Copy the password to the interface
Final Thoughts
The above only covers part of the story. Continuous integration is an ongoing process, a philosophy that requires continuous adjustment and configuration based on actual circumstances. I once read an article that explained this very well - standardized steps should be handed over to programs as much as possible, as this is more efficient and more secure. Humans inevitably make mistakes.
Having attended DevOps conferences before, I’ve finally taken the first step.