For obvious reasons, getting to Google has become harder. I’ve moved from SS to V2Ray and cycled through Bandwagon, DigitalOcean, and Vultr as VPS providers. Each switch means redeploying everything from scratch—tedious. To save time, I built a Docker image tailored to my needs so I can deploy or update in one go.
Quick Deployment
I put together a helper to generate configs quickly: https://alanhe421.github.io/v2ray-docker/
Fill in the fields, download the generated files, and you’re ready to deploy.
Prerequisites
A working connection to reach the VPS provider’s site (e.g., https://bandwagonhost.com/)
Picking a VPS
The usual suspects apply. I use Vultr because the pricing is flexible and it has Japanese regions. DO currently lacks Japan nodes.
Once the server is ready, move on to configuration.
Vultr Referral

Notes
- The server’s time zone doesn’t really matter—V2Ray adjusts automatically—but make sure the clock is accurate.
- DigitalOcean bills by the hour. Shutting down the droplet doesn’t stop charges; deleting it does.
- I go with
CentOS 7 x64. - I prefer the Japan region: good speed and Hong Kong YouTube Premium works there.
Install Docker CE
$ wget -qO- https://get.docker.com/ | sh

# Allow non-root users to run docker (skip if you’re root)
$ sudo usermod -aG docker username
Start Docker CE
CE stands for Community Edition.
$ sudo systemctl enable docker
$ sudo systemctl start docker
Install Docker Compose
$ sudo curl -L "https://github.com/docker/compose/releases/download/1.24.1/docker-compose-$(uname -s)-$(uname -m)" -o /usr/local/bin/docker-compose
$ sudo chmod +x /usr/local/bin/docker-compose
$ sudo ln -s /usr/local/bin/docker-compose /usr/bin/docker-compose
$ docker-compose --version  # verify installation
Prepare the Files
.
├── docker-compose.yml        # compose config
├── init-letsencrypt.sh       # script to fetch certificates
├── nginx
│   └── conf.d
│       └── default.conf
└── v2ray
    └── config.json

3 directories, 4 files
The full configs live here: alanhe421/v2ray-docker. Below are the fields you need to tweak.
init-letsencrypt.sh
- Update
domainswith your own domain name. - Fill in the contact email.
nginx/conf.d/default.conf
- Replace
server_namewith your domain. - Update the certificate paths to point to your domain.
v2ray/config.json
- Change
clients.id. I recommend generating a new UUID with this generator.
Uploading the Files
FileZilla works well, or use scp:
$ scp -r /Users/xxx/Documents/GitHub/v2ray-docker root@ip:/var/v2ray-docker
Start the Services
SSH into the VPS and run:
$ cd /var/v2ray-docker
$ chmod +x ./init-letsencrypt.sh
$ ./init-letsencrypt.sh
$ docker-compose up -d
Tips
Containers can reach each other via service names, e.g., V2Ray listens at
http://v2ray:10086inside the network.When configs change, run
docker-compose up -dto recreate the containers. Compose removes the old ones, creates new ones with fresh IPs, and keeps the service names unchanged. Connections to the old containers drop and reconnect to the new ones.When
./init-letsencrypt.shsucceeds, you’ll see a confirmation message. Failures can happen (for instance, I hit issues on CentOS 8 and switched to 7).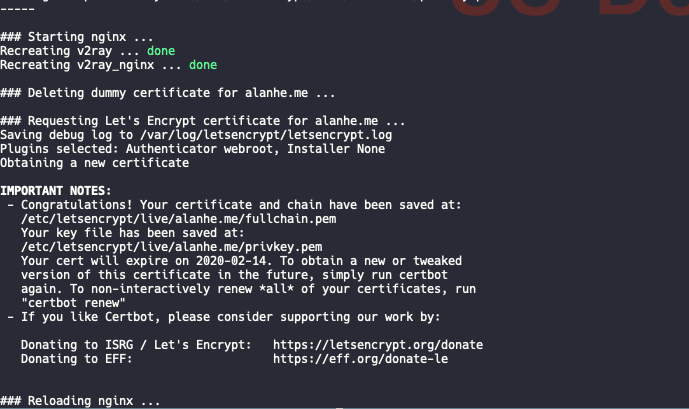
docker-compose restart nginxreturning success doesn’t guarantee Nginx actually started—check the logs.Inside an Nginx container,
localhostpoints to the container itself. Use service names or IPs for upstreams.
Handy Commands
$ docker network ls
$ docker-compose restart           # restart all services
$ docker-compose restart nginx     # restart just nginx
DNS
Log into your DNS provider and create an A record that points the domain to the VPS IP.
Client Setup
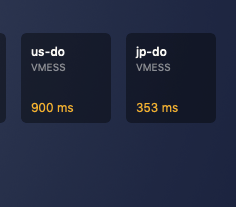
Once the server side is running, configure your client. I use Surge; here’s the latency difference between my old DigitalOcean U.S. node and the current Vultr Japan node:
Reminder
Even with correct settings, connectivity might take a moment. If everything looks right but still fails, give it about 10 minutes.
TL;DR
If you don’t want the background, generate the config bundle here and deploy directly:
https://alanhe421.github.io/v2ray-docker
Suggestions
- On Vultr, pick a Japan instance running
CentOS 7 x64. - Use clients such as Clash or Surge.
Final Thoughts
After this automation work, spinning up a new V2Ray server only requires inputting the config, uploading the package, and starting the stack—no more tedious manual steps. Totally worth it.