I recently bought a new Mac and used Time Machine to restore everything. The process was so smooth that I wanted to document it—maybe it’ll help you too.
Note: The OS versions mentioned below were from the original migration, but the same process works today.
Prep
- Synology NAS running Time Machine; backup image came from MacBook Pro 2015 (macOS 10.14 Mojave)
- Target machine: MacBook Pro 2016 (macOS 10.15 Catalina)
- NAS and Mac on the same LAN
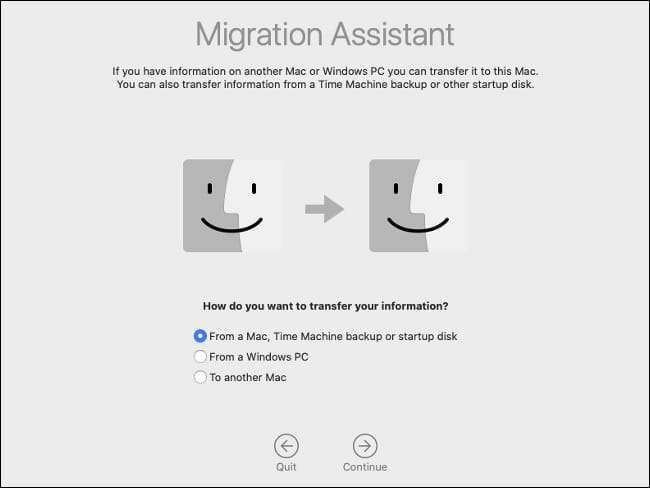
Start the Migration
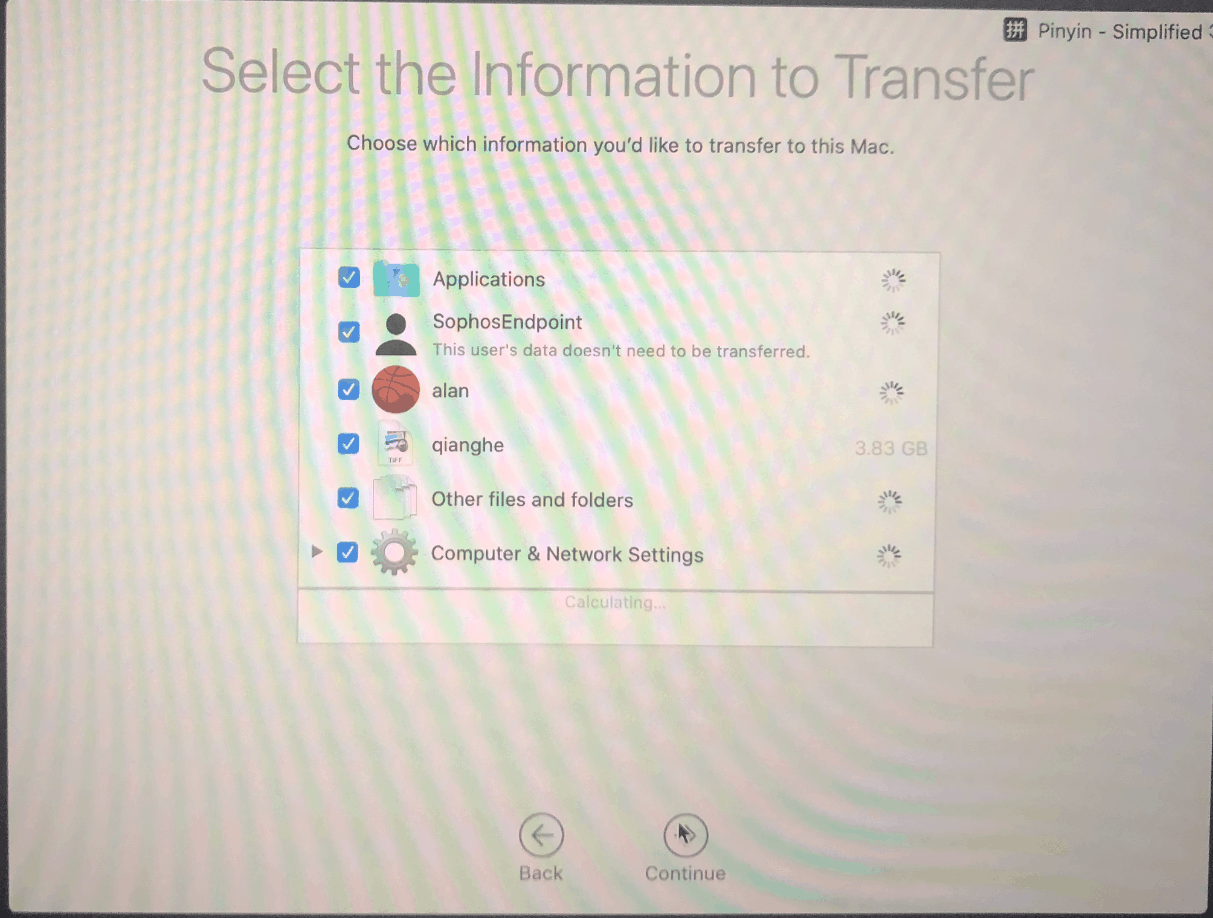
When you boot the new Mac, Setup Assistant offers to restore from Time Machine. Select the backup, choose what to transfer, and let it run. Mine took about four hours.
Tips
Source and target macOS versions don’t have to match (I migrated 10.14 → 10.15).
If you see
No Volumes found in backup, retry; temporarily disconnect the old Mac from the NAS if it’s still connected.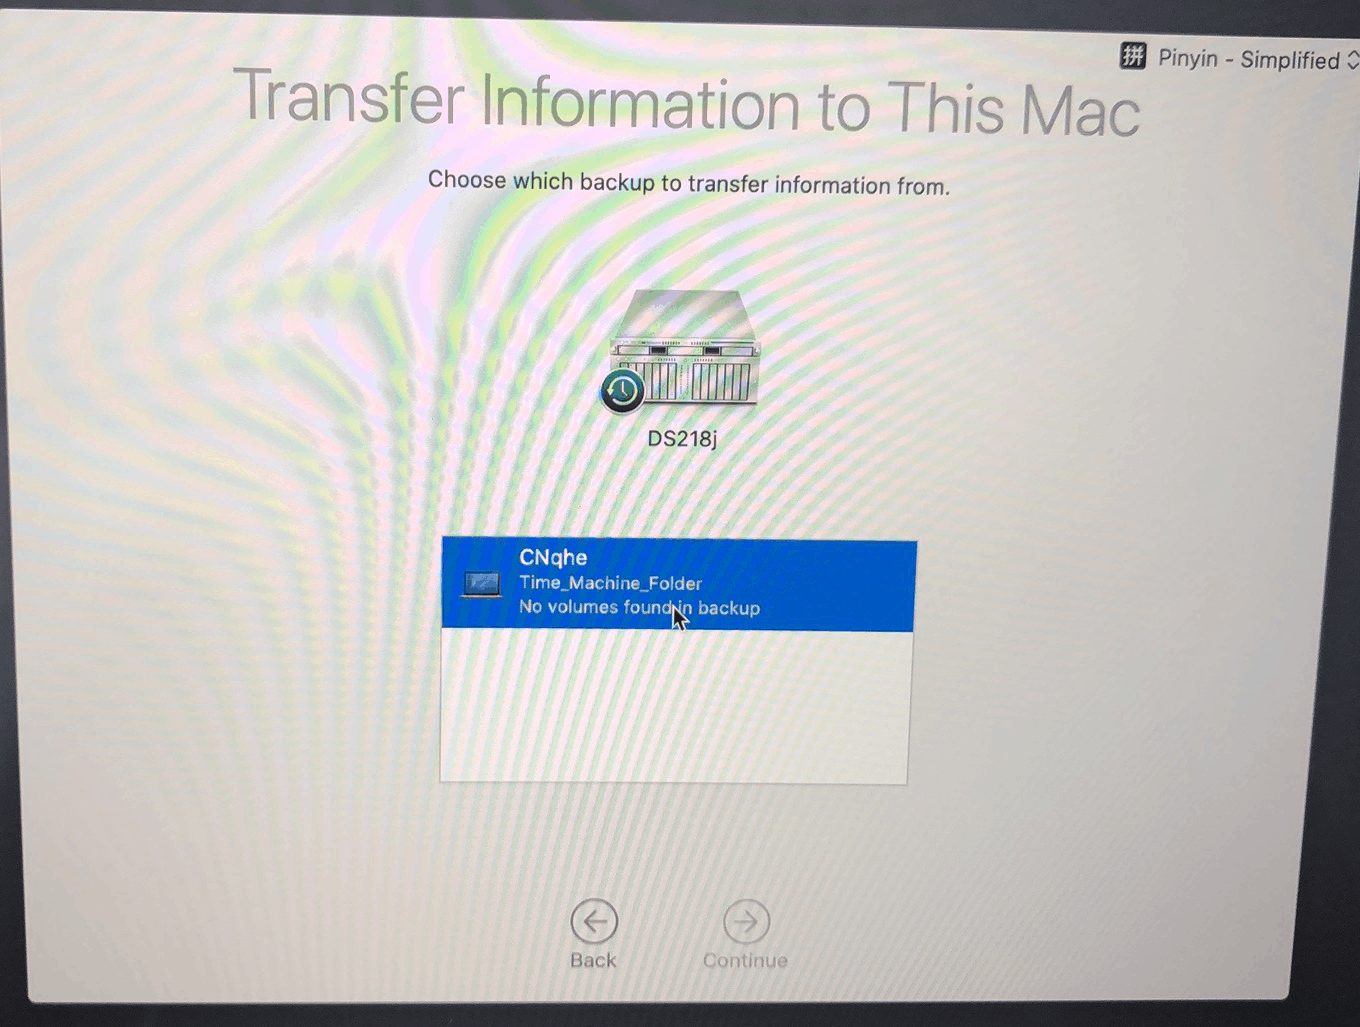
After the Restore
A fresh Mac isn’t 100% ready immediately—there’s still some housekeeping:
- Sign in to your Apple ID.
- Re-authorize apps in Security & Privacy (camera/mic/files, etc.).
- Some apps may fail to launch (WeChat did); reinstall if needed.
- License-activated apps need reactivation on new hardware.
- Wi-Fi may connect but not pass traffic—create a new Location in Network settings and reconnect.
Update
Both my new MacBook Air m4 and Mac mini m4 were restored from an old MacBook Pro via Time Machine—still fast and reliable.
Final Thoughts
Setting up a new Mac used to mean rebuilding everything from scratch—painful for developers. Time Machine on a NAS saved me at least a day of work. Highly recommended.
- Kudos to Apple.
- A ~$2K NAS with Time Machine support is far more convenient than manual external-drive backups.
- My first Mac (July 21, 2016) was life-changing—I’m not going back to Windows. It’s not just the OS; it’s the whole ecosystem.