While the Fig interface is sleek, its real value resides in the specification (spec) definitions. These specs tell Fig how to interpret commands and provide intelligent completions. This post covers the workflow for customizing these specs and bringing them into your production environment.
Anatomy of a Fig Spec
A Fig spec is a TypeScript file that defines the structure of a CLI tool, including its subcommands, options, and arguments. Here are some examples from the official repository:
You can find the underlying Type definitions in the autocomplete-tools repo.
1. Contributing to the Official Repository
If your CLI tool is public, the best approach is to contribute directly to the withfig/autocomplete repo. Once merged, your completions become available to all Fig users.
The Development Workflow:
- Fork and Clone: Fork the repository and clone your fork locally.
- Setup: Add the original repo as a remote and install dependencies.
git remote add upstream https://github.com/withfig/autocomplete.git pnpm install - Create a Spec: Use the Fig CLI to scaffold a new spec (e.g., for a tool called
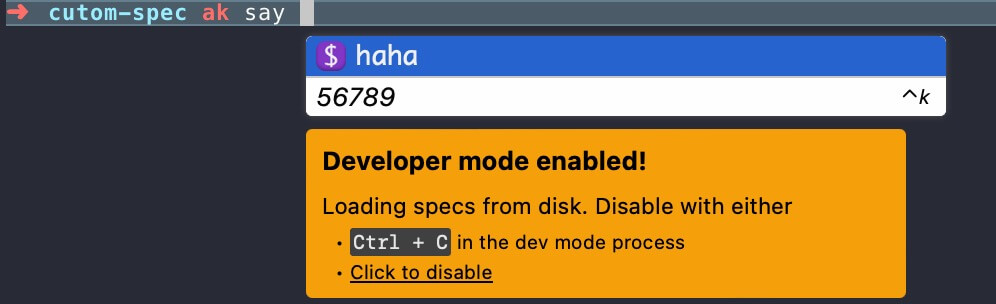
mytool).pnpm create-spec mytool - Developer Mode: Enable
devmode. This tells your local Fig instance to load specs from your current directory instead of the global cache.pnpm dev
2. Managing Private or Internal Specs
If you’re building completions for private internal tools, you don’t want to submit them to the public repo. Instead, you can manage them in your own standalone project.
Standalone Setup:
- Scaffold the project:
npx @withfig/autocomplete-tools create-spec - Build and Register: Running the
devcommand will compile your TypeScript spec and register it with Fig.npx @withfig/autocomplete-tools dev
Example Spec Structure:
Here is a basic template for a custom completion spec:
const completionSpec: Fig.Spec = {
  name: "mytool",
  summary: "A powerful internal dev tool",
  subcommands: [
    {
      name: "deploy",
      summary: "Deploy the project to production",
      options: [
        { name: ["--force", "-f"], summary: "Force deployment" }
      ]
    }
  ],
  options: [
    { name: ["--help", "-h"], summary: "Show help information" }
  ],
};
export default completionSpec;
Developer Mode Toggles
To test your specs, you must ensure your terminal environment is in developer mode.
- In Amazon CodeWhisperer (which acquired Fig): Toggle this through the application settings UI.
- Via CLI: Use the following command to toggle the NPM developer mode:
fig settings autocomplete.developerModeNPM true
Summary
By mastering Fig specs, you can transform your command line from a blank prompt into an intelligent, guided experience. Whether you’re helping the global community or just streamlining your team’s internal tools, custom specs are the key to a faster CLI workflow.