I’ve been using Cursor for half a year, and it’s indeed quite good, but its weakness is the poor AI stability. Recently, I noticed that Copilot has made significant improvements, such as supporting NES, so I decided to try switching to Copilot. After experiencing Copilot in VSCode for several weeks, I feel it meets my needs. Therefore, I unsubscribed from Cursor and switched directly to using Copilot in VSCode.
Next, I’ll share my experience and tips for using Copilot in VSCode.
Installation
You need to install the following 2 plugins, both are essential.
Login
Note that the Copilot login account can be different from VSCode’s own sync account, meaning it supports multi-account login. I currently use multiple GitHub accounts to log into VSCode, with one specifically for Copilot.
Purchase
Currently, I recommend monthly subscription since AI tools are constantly evolving. If you’re purely looking for cheaper options, annual subscription is also fine.
If you get a free subscription through Edu, it’s Copilot Pro.
Usage Tips
Enable Agent
It’s recommended to enable this, otherwise, there’s no agent option in chat. Also, this setting is not under Copilot, so I recommend searching with the “agent” keyword.

Enable NES
It’s recommended to enable NES, which allows partial completion.
If there’s no completion content when typing on a page, it might be because NES is not enabled. It could also be that this file type is not enabled. In this case, click the Copilot icon in the bottom right corner to confirm if NES is checked.

Chat
Currently, models like Claude 3.5 support images, so you can directly paste screenshots. For example, if we paste a prototype design, we can have AI generate code based on the design.
Keyboard Shortcuts
For high efficiency, keyboard shortcuts are essential. Here are examples for Mac:
Ctrl+Command+I: AI ChatCommand+I: AI PopupCommand+Right Arrow: Accept partial completion
Instructions .github/copilot-instructions.md
This instruction document is similar to rules in Cursor. For example, we can clearly specify the technical frameworks and coding standards used in the project in this document, so that AI will be more accurate when generating code.
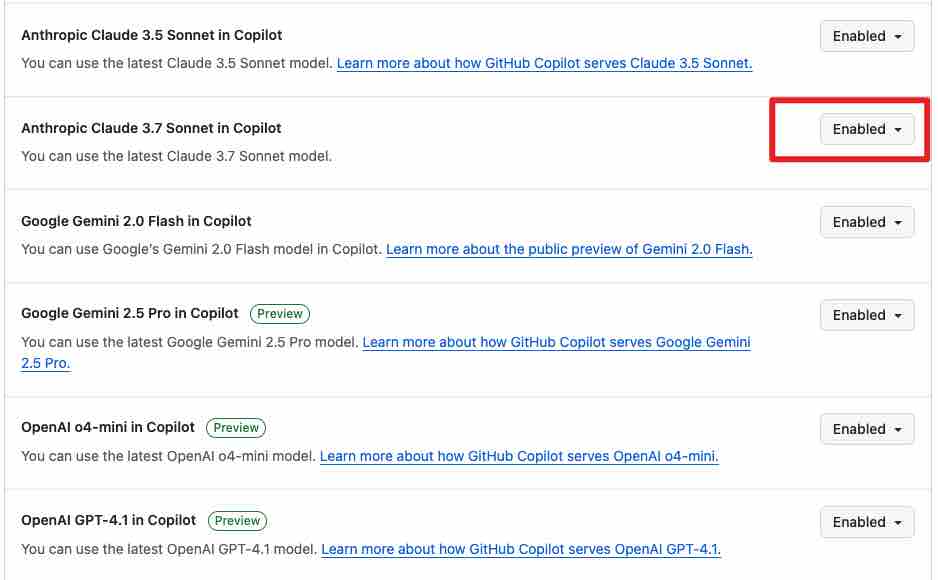
Some AI Models Are Not Visible
By default, some models are not enabled. You need to visit https://github.com/settings/copilot. Select the corresponding model, set it to enabled, and restart VSCode.
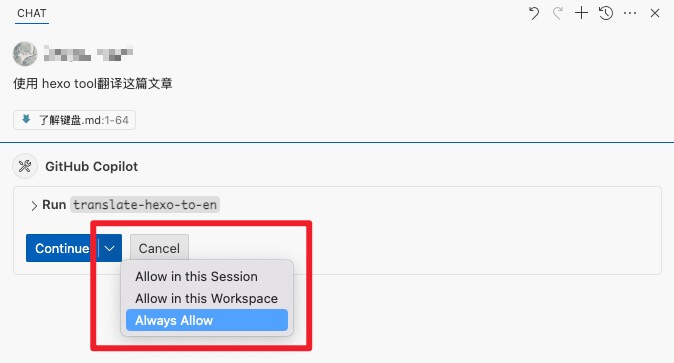
MCP Tool
Copilot, similar to Cursor, supports MCP. There are a few things to note:
- MCP is only supported in Agent mode. In Ask mode, there’s no tool option.
- Currently, you cannot directly specify which MCP tool to use; you can only invoke a tool through natural language input.
- If you find clicking “allow” to execute a tool every time too cumbersome, you can select “always allow” from the dropdown button. Personally, I prefer to manually allow each time.

Final Thoughts
Personally, I think Copilot is indeed excellent, and the price is very reasonable. Following the principle of “the earlier you use it, the sooner you enjoy it,” it’s worth a try.