Whether you’re a casual user or a macOS enthusiast, these steps will help secure your system.
🛠️ Keep macOS Updated
The most fundamental advice: stay current. Apple regularly ships macOS and app updates that patch security flaws. Installing them provides the latest malware and virus protection.
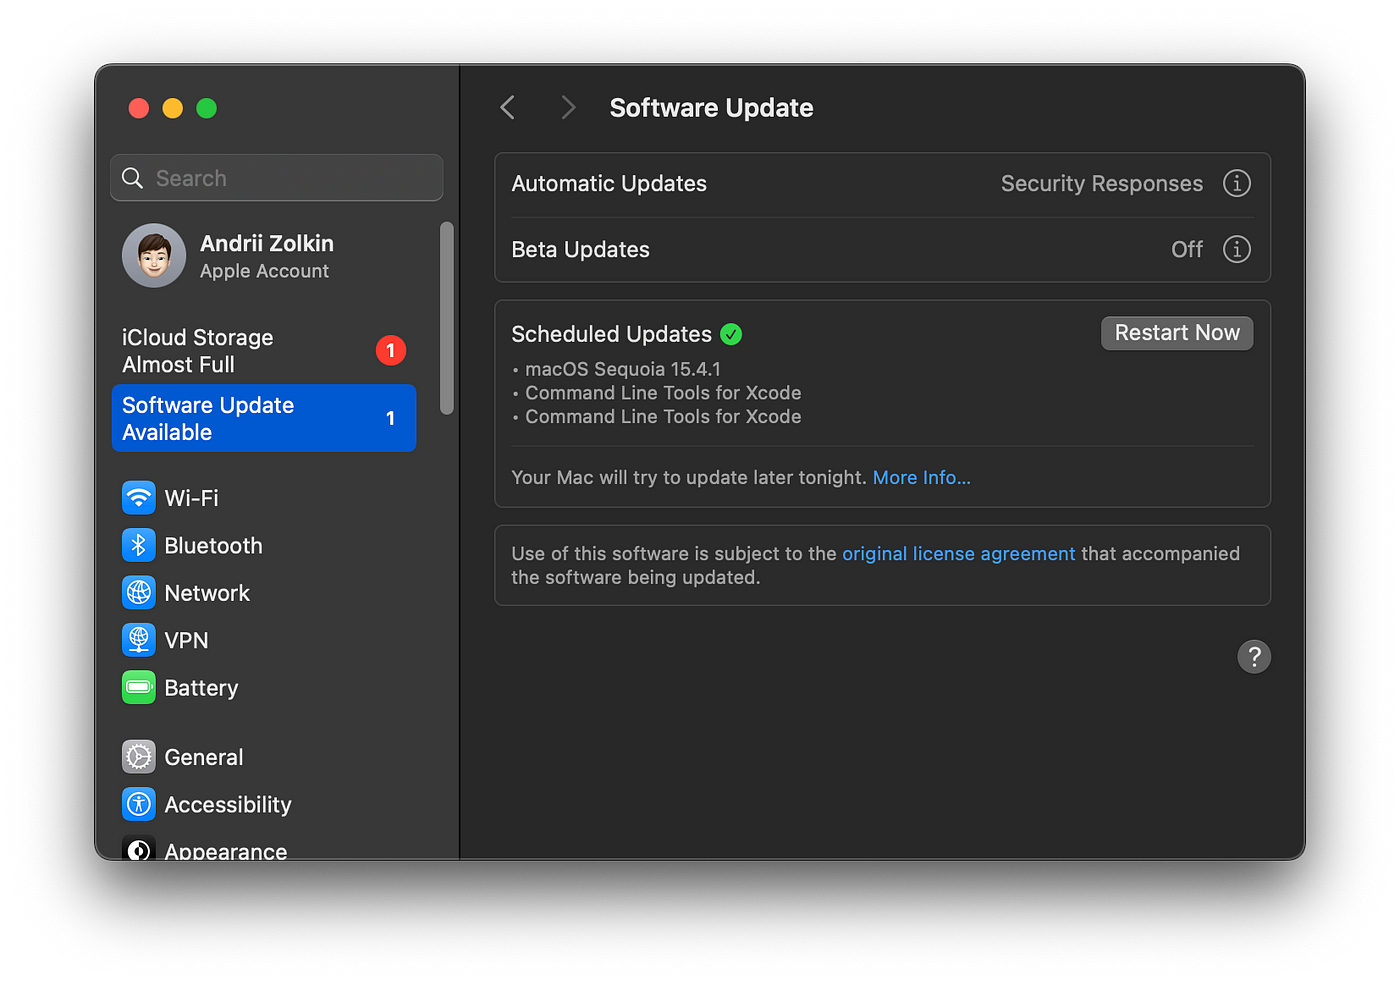
Go to Apple menu → System Settings → General → Software Update.
You can even let your Mac check and download updates automatically—I schedule mine overnight.
🔑 Use Strong Passwords and Passkeys
Use strong, unique passwords for your login and critical accounts.
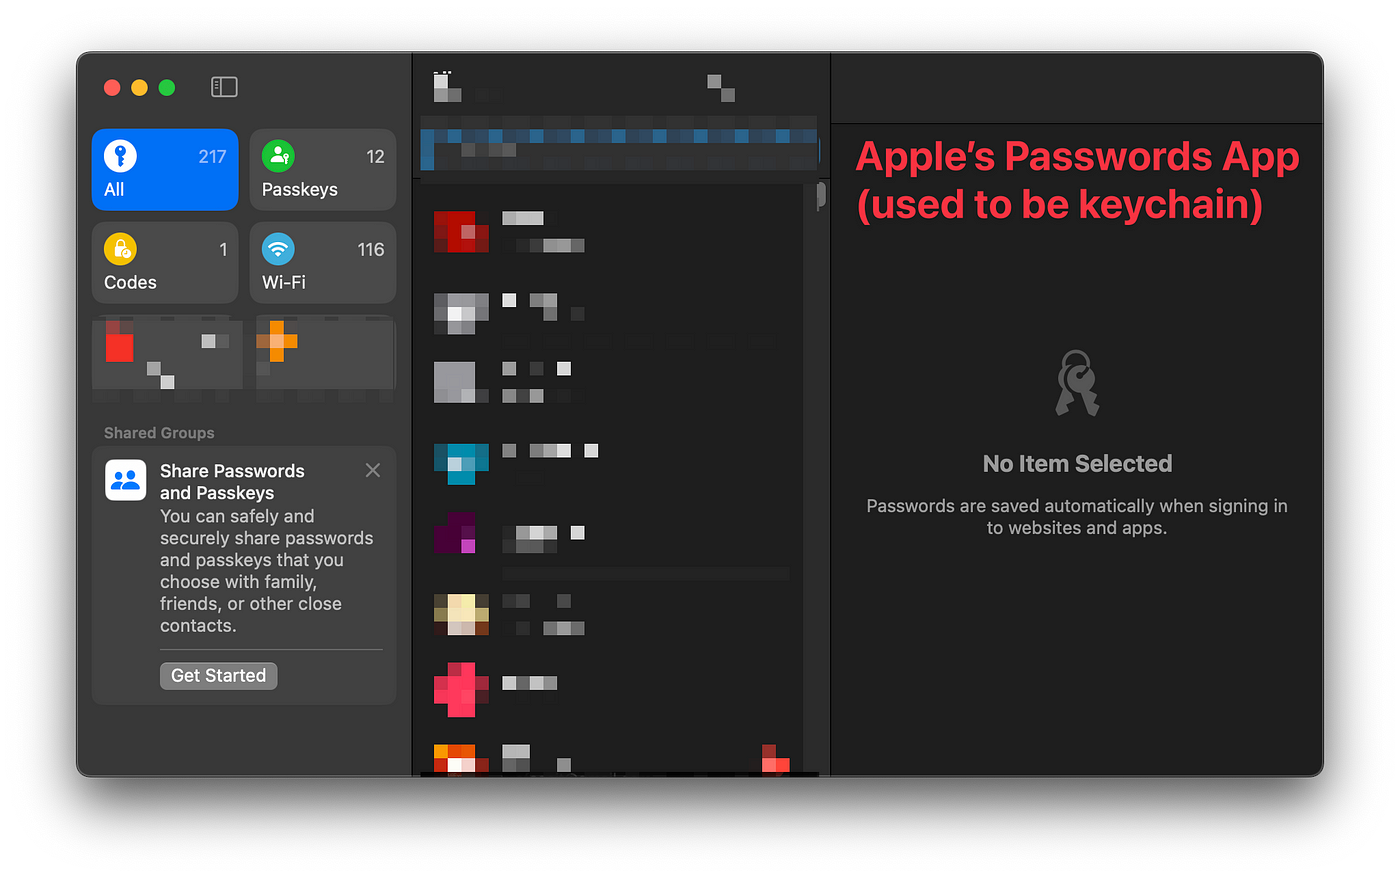
I keep separate email addresses for different purposes. iCloud Keychain (the new Passwords app) can generate and store strong passwords so you don’t have to memorize them. It’s convenient, though it does increase reliance on Apple’s ecosystem.
Nothing beats an old-fashioned password notebook—clunky but very secure.
Enable Passkeys and Two-Factor Authentication
If you own an iPhone, you might never need to type codes again.
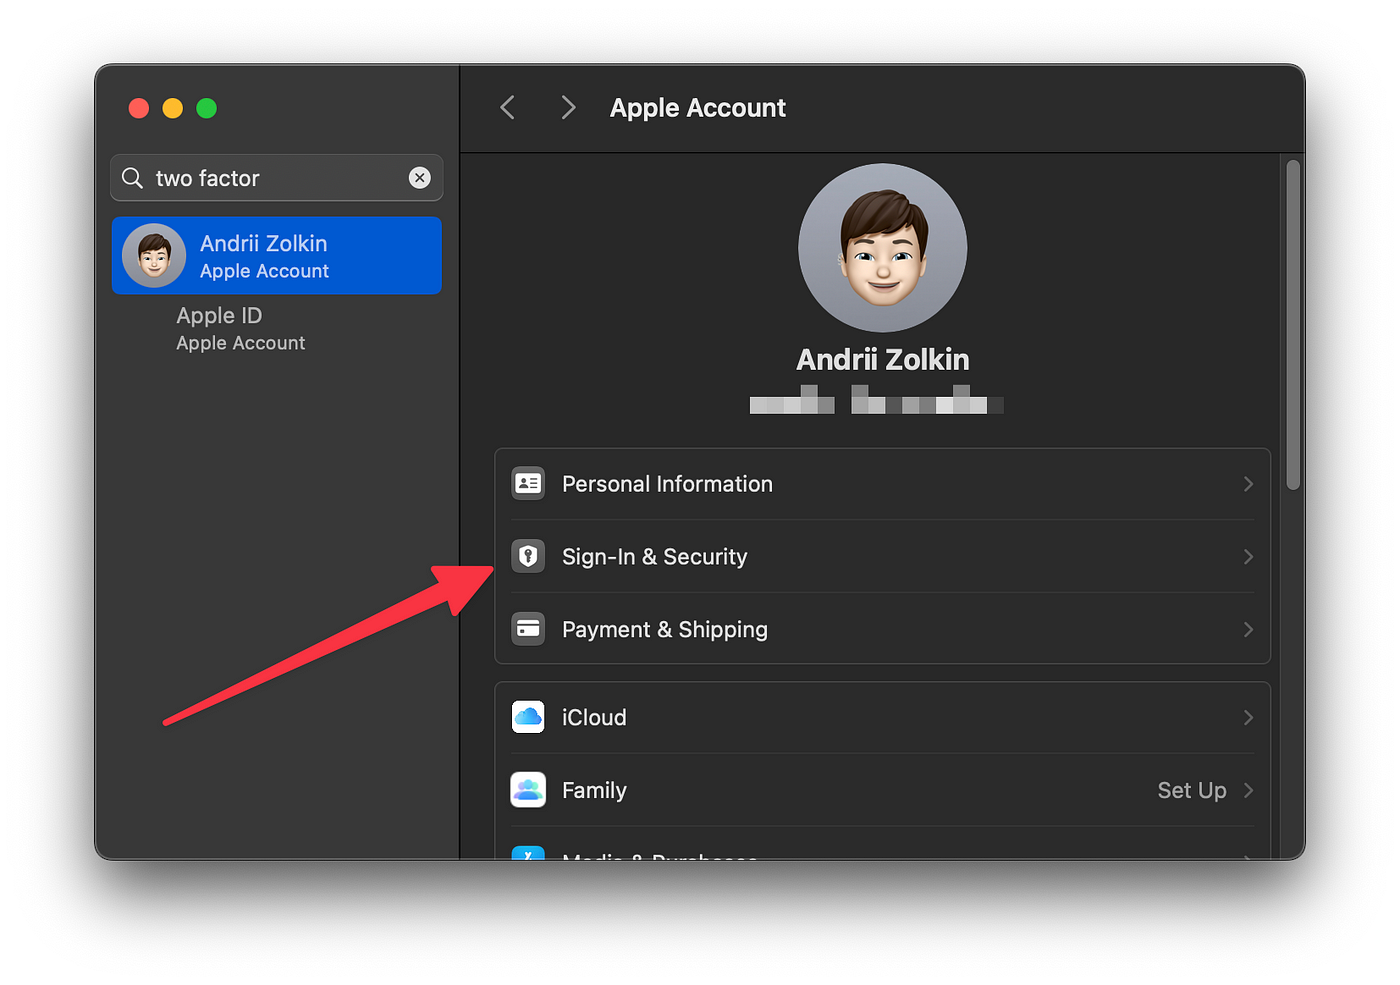
Use Face ID or scan QR codes with your iPhone camera to sign in. Enable it via:
System Settings → Apple ID (top of the sidebar) → Sign-In & Security → Two-Factor Authentication → Turn On
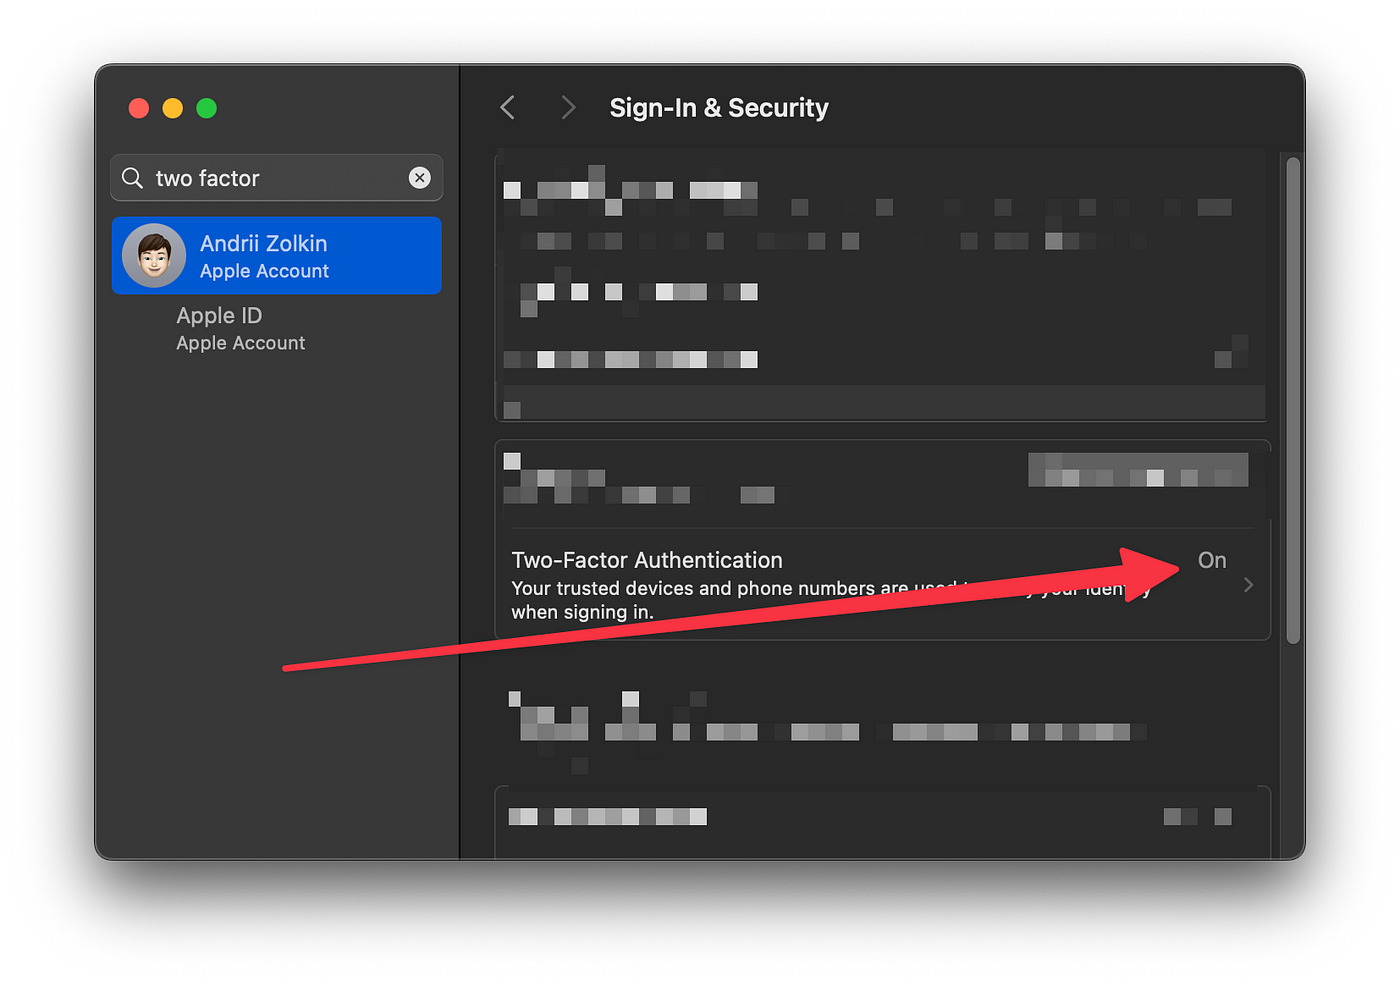
This blocks shoulder surfers from stealing passwords and saves you time—scan your face and you’re in.
👥 Use Standard Accounts for Family Members
Sharing a Mac? Give everyone their own user profile, preferably standard (non-admin) accounts.
Mistakes happen—kids download shady files, grandparents click suspicious pop-ups. Even if malware sneaks in, a standard account prevents it from owning the entire system.
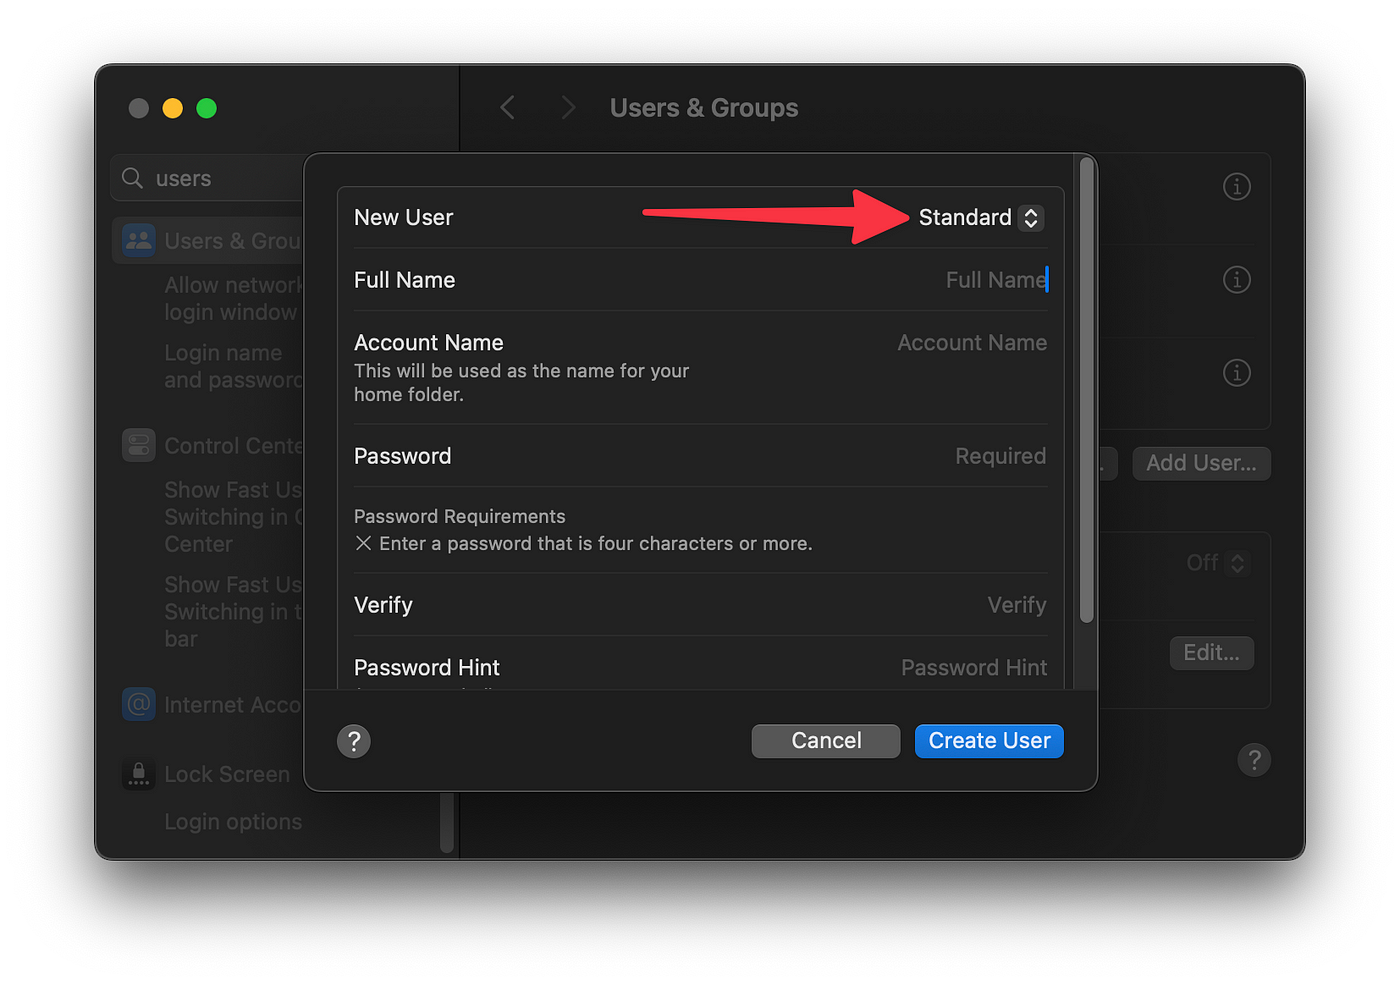
Create a Standard Account
Head to System Settings → Users & Groups (use the search bar to find it).
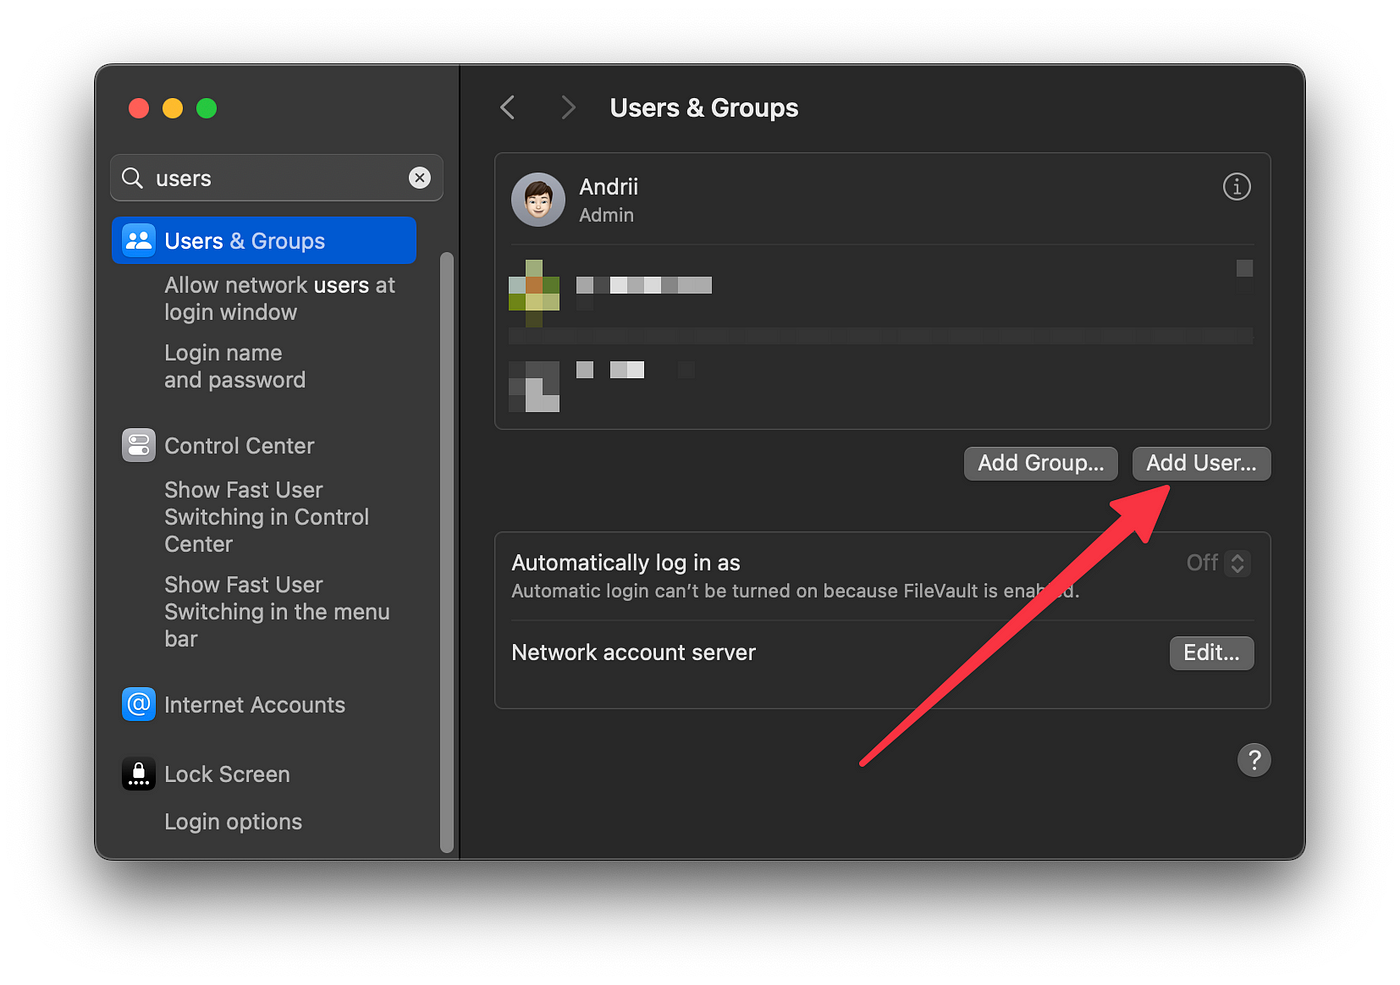
Add a user and set the role to Standard instead of Administrator.
Disable Automatic Login
Return to System Settings → Users & Groups and turn off automatic login.
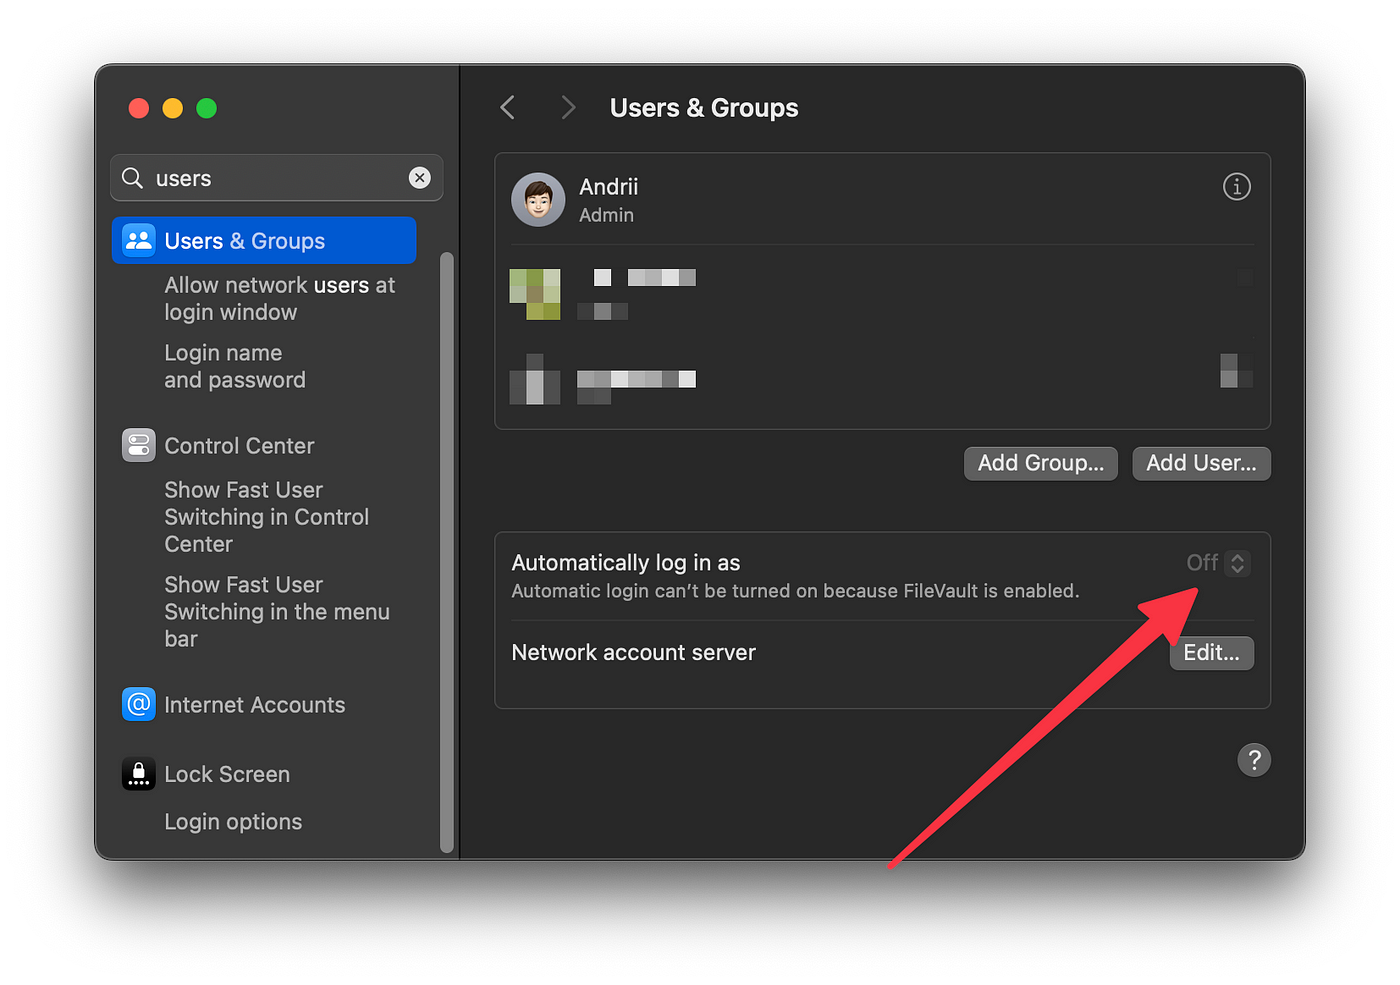
If FileVault is enabled (covered below), auto-login might already be off. Without automatic login, someone who grabs your Mac can’t start using it instantly. Touch ID takes a second—worth the security trade-off.
Lock Your Mac Quickly
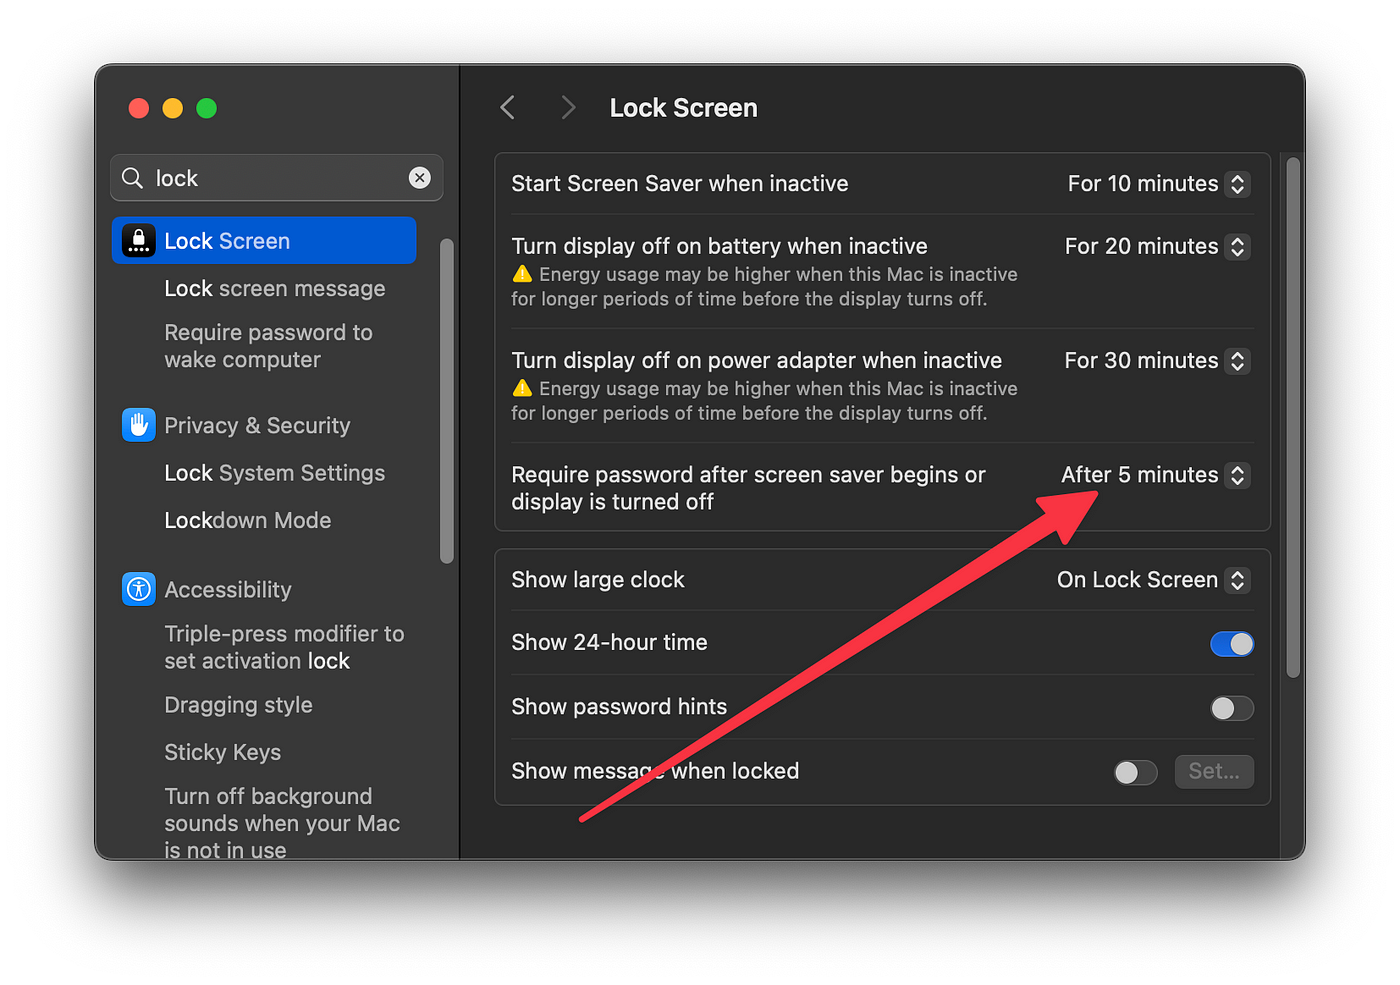
In System Settings → Lock Screen, require a password shortly after sleep or the screen saver starts. That way your Mac locks promptly when you step away.
🔒 Turn On FileVault Disk Encryption
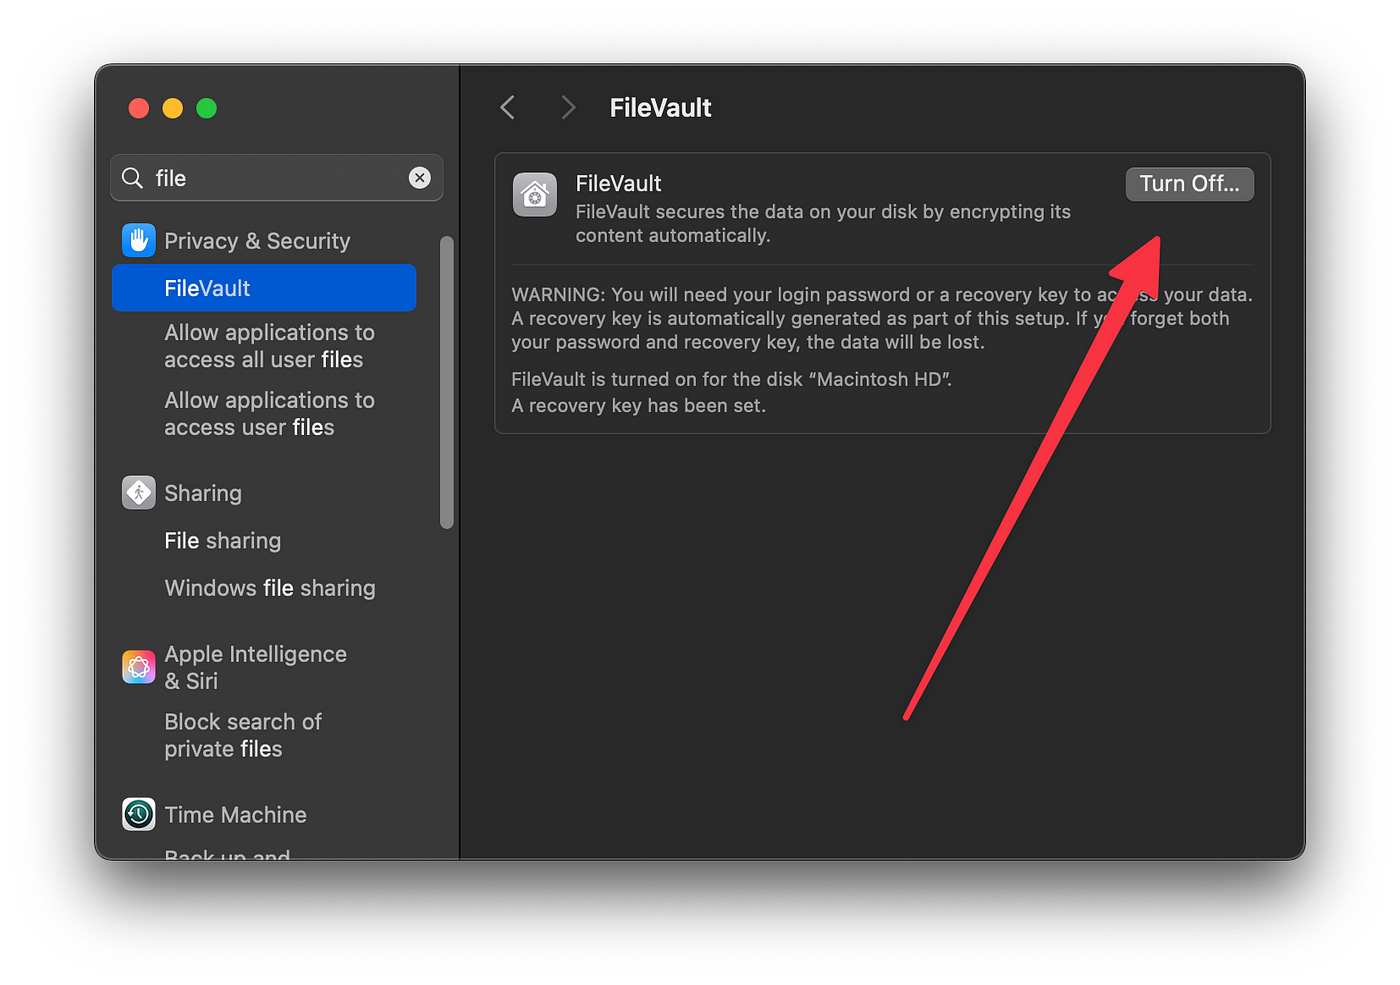
FileVault encrypts your entire disk so thieves can’t read it. Enable it at System Settings → Privacy & Security → FileVault. macOS encrypts in the background (it may take a while). Afterward, nobody can open your documents or photos without your password.
Important: You’ll receive a recovery key. If you forget both the key and your password, your data is gone.
🔥 Enable the Firewall and Review Privacy Settings
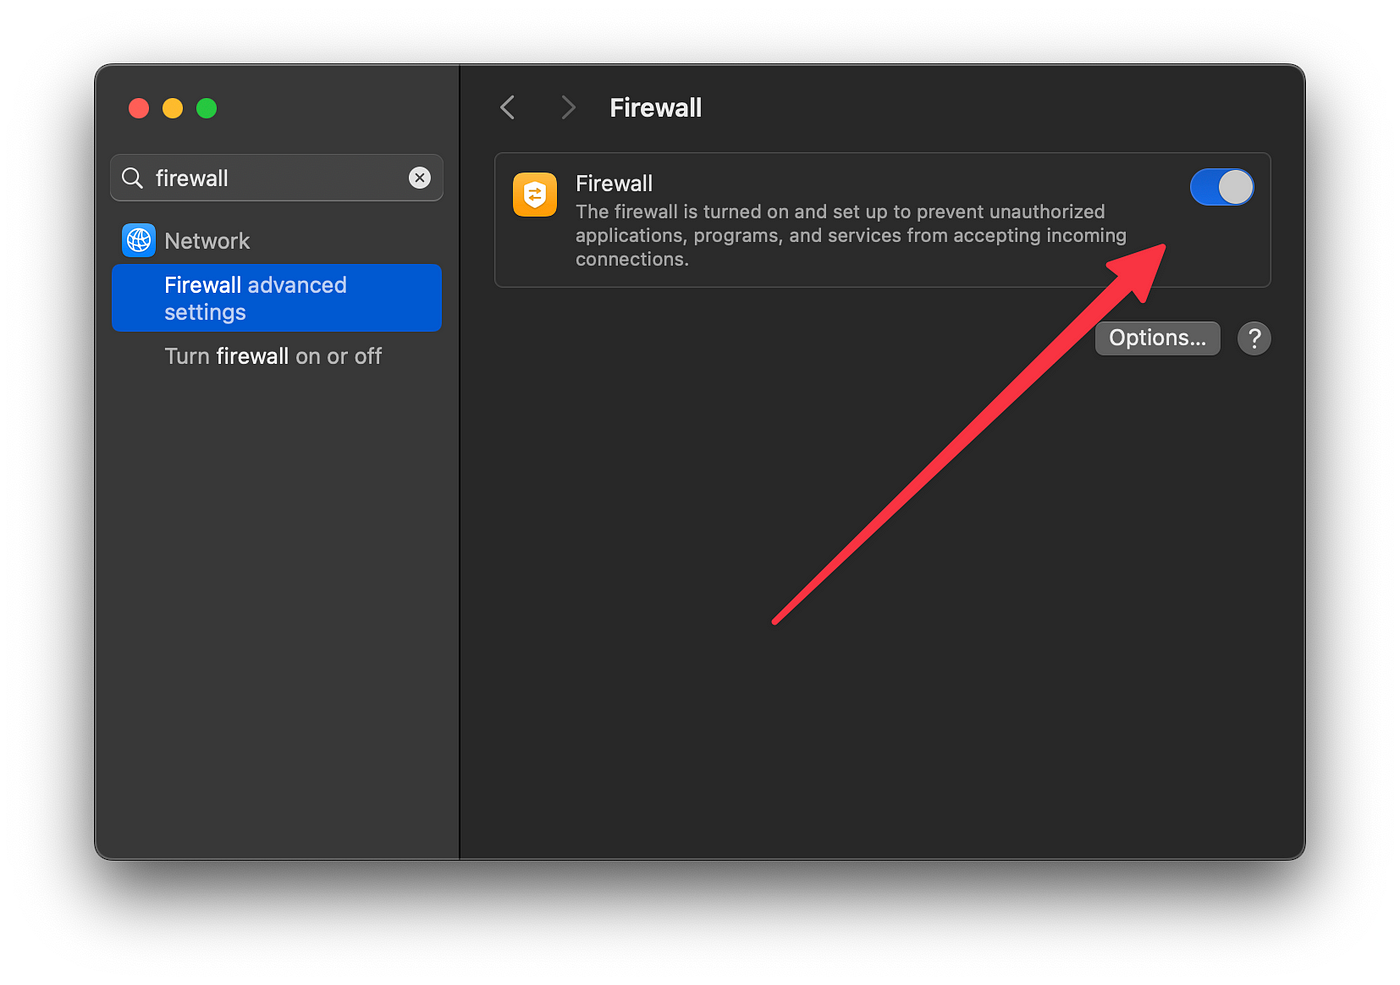
The firewall is separate from FileVault. It blocks unwanted inbound connections. Turn it on at System Settings → Network → Firewall—especially on public Wi-Fi.
Review App Permissions
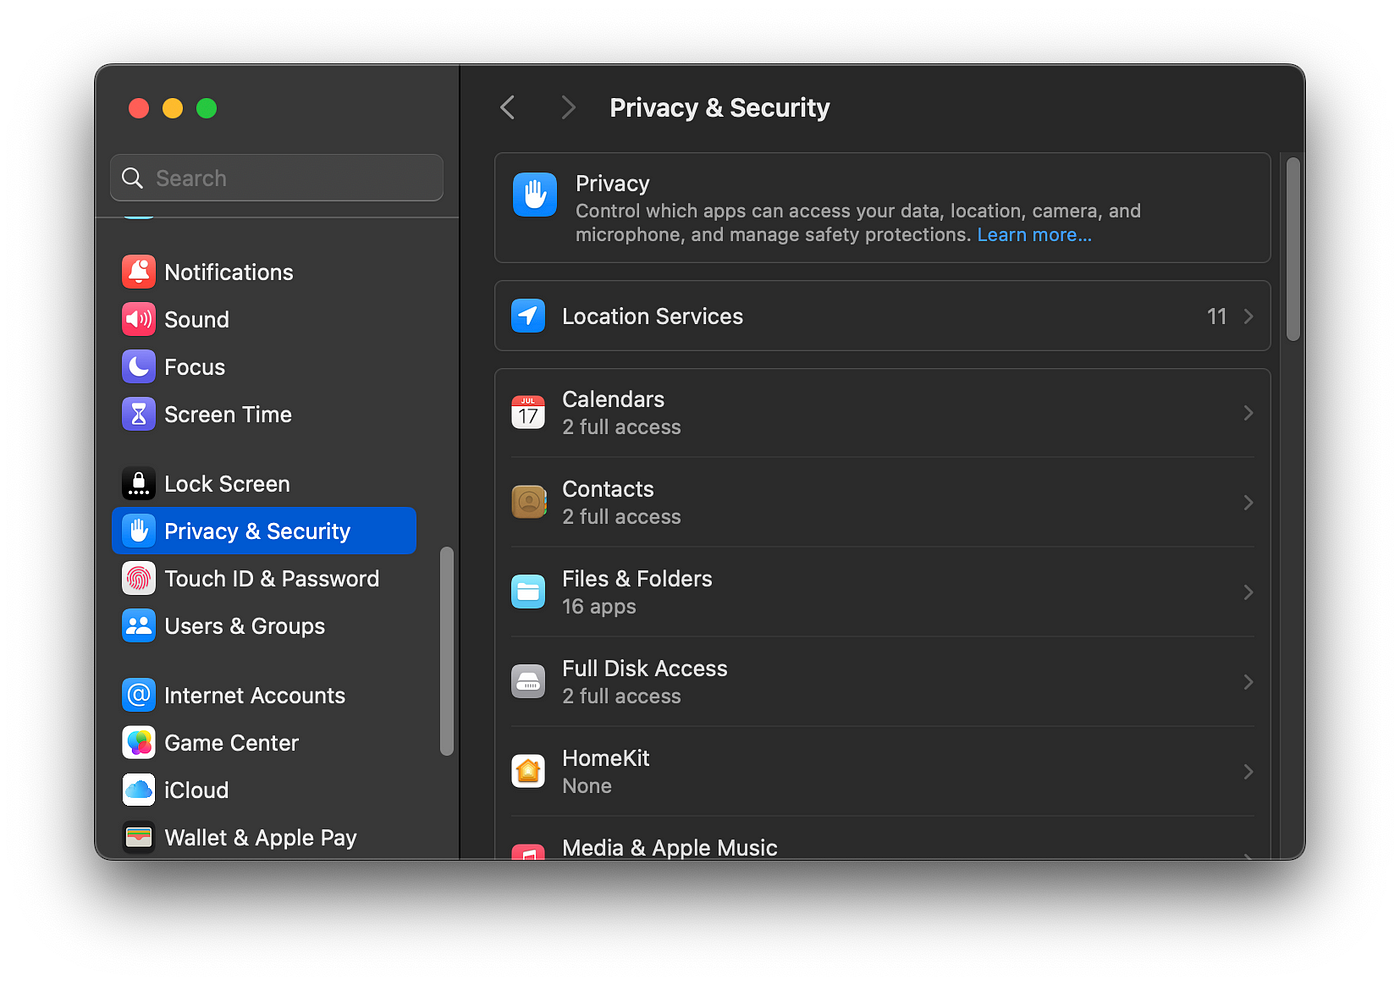
In System Settings → Privacy & Security, check which apps can access your camera, microphone, location, and photos. Disable anything unnecessary (casual games usually don’t need microphone access).
Pay for a VPN
The firewall isn’t foolproof. If privacy matters, invest in a quality VPN; it protects connections and unlocks perks (like more Netflix catalogs). I’ve used CyberGhost for five years with no issues.
🍏 Opt Out of Analytics and Ad Tracking
macOS may share usage analytics, allow apps to request analytics, and show personalized App Store ads by default. To opt out:
System Settings → Privacy & Security → Analytics & Improvements and Apple Advertising.
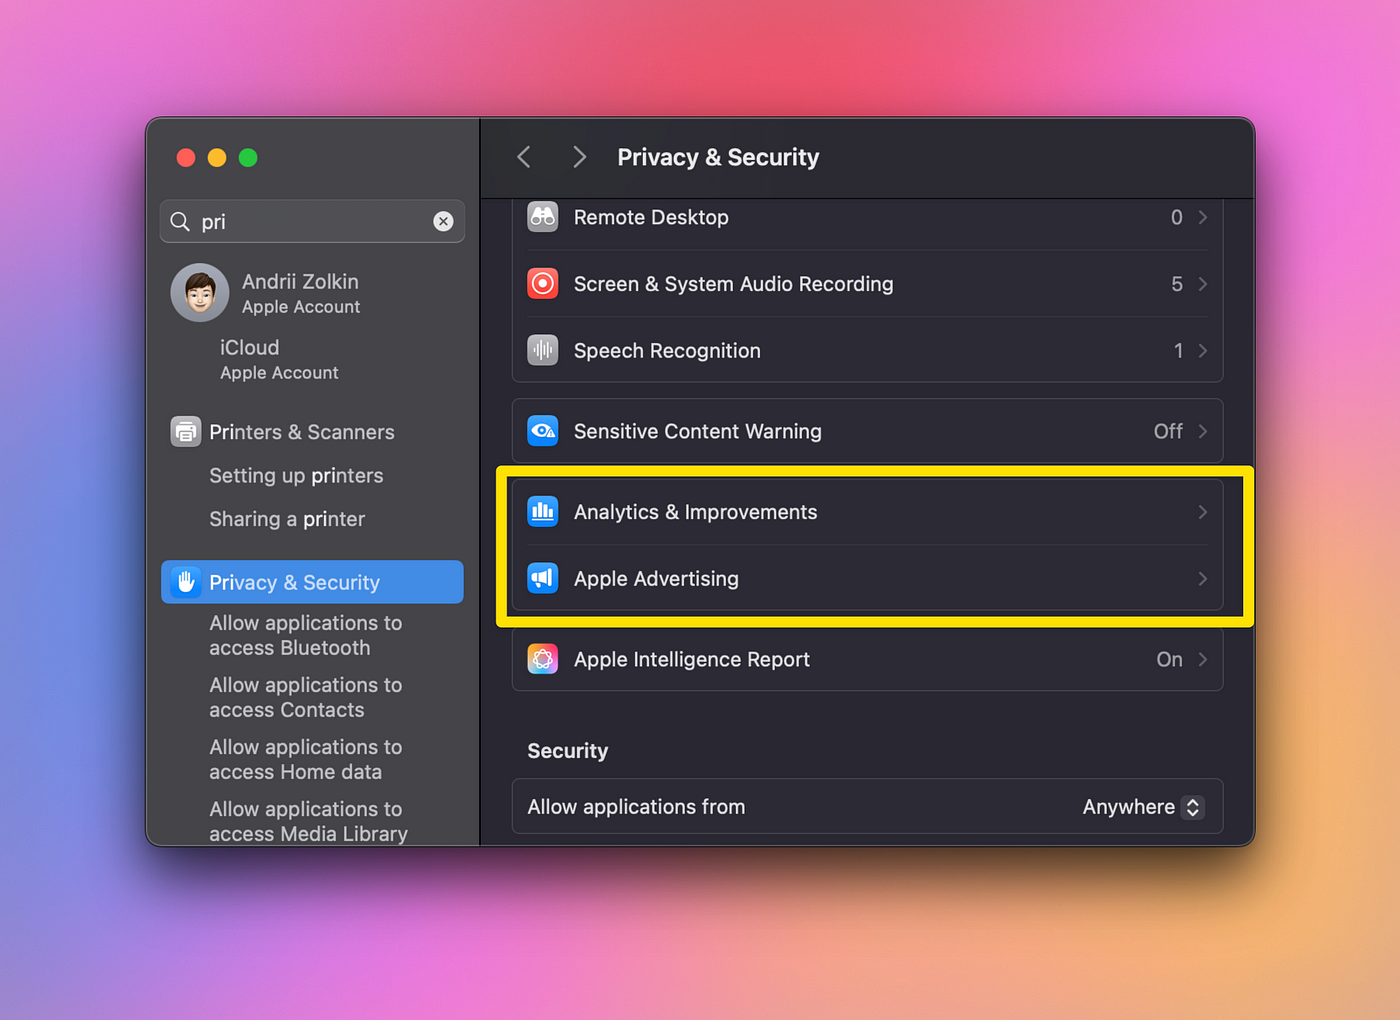
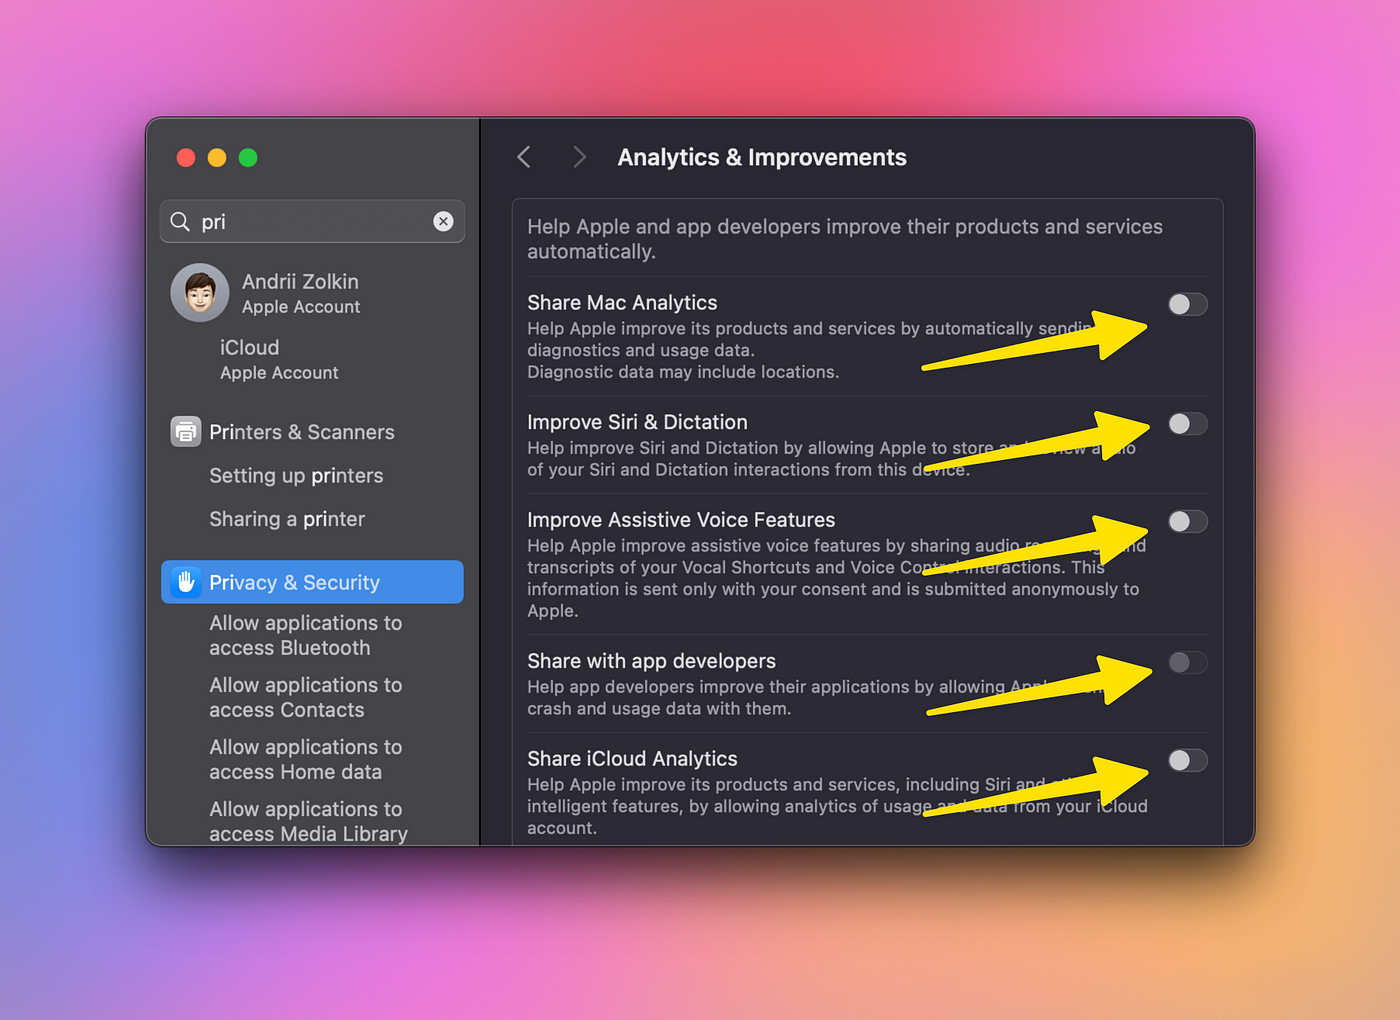

This limits data collection by Apple and third-party developers without breaking functionality.
This section is adapted from another article of mine focused on macOS productivity tips.
💾 Back Up Your Data
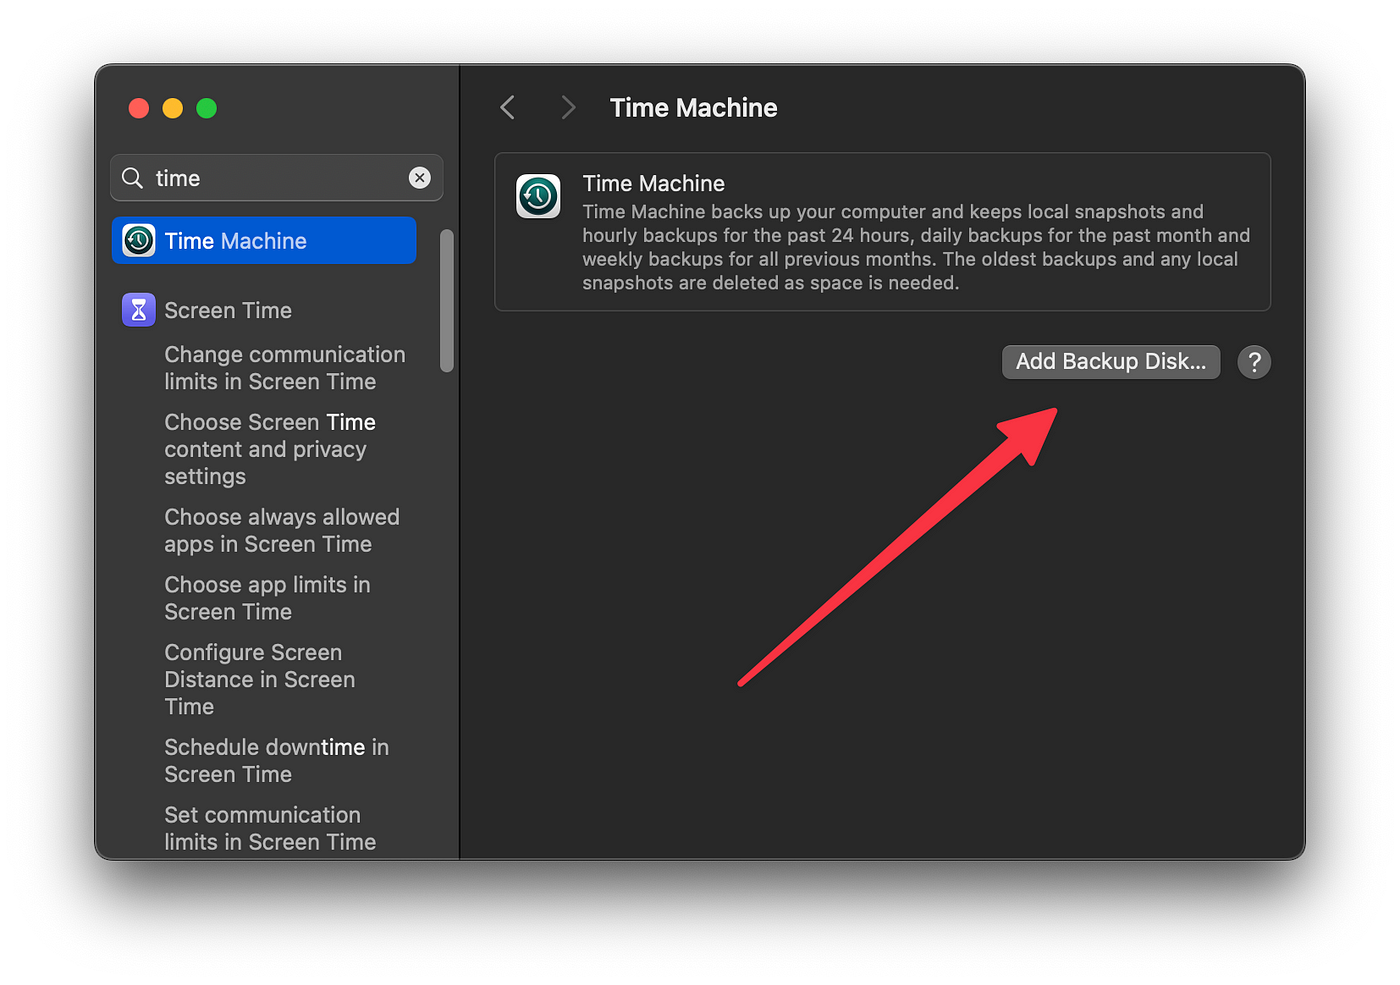
Backups protect you from accidents, theft, malware, or drive failures. The easiest approach is Time Machine:
Connect an external drive → System Settings → General → Time Machine → turn it on. Time Machine backs up automatically every day.
Cloud storage (iCloud, Dropbox, etc.) is another option for documents and photos.
🌐 Additional Tips
- Be cautious online. Ignore links and attachments from unknown senders.
- Don’t download shady software or pirated apps—saving $20 isn’t worth a malware infection.
- Never leave your laptop unattended, whether it’s a café, airport, or police station.
🔄 Conclusion: Be Careful, Not Paranoid
Digital life is part of daily life. Protect it the same way you protect yourself.