Developer, digital product enthusiast, tinkerer, sharer, open source lover
Apple App Development Guide: Common Problems and Solutions
Practical notes on Apple app development, App Store submission, paid support, usage reports, and common issues.
Multica Go User Guide: Practical Features for a Better Mobile Workflow
Multica AI is an excellent AI agent management platform. Once you start using it seriously, however, you quickly run …
How to Use Claude (Step-by-Step Guide)
This Claude guide collects practical usage methods and tips to help users better understand and use Claude. Clear chat …
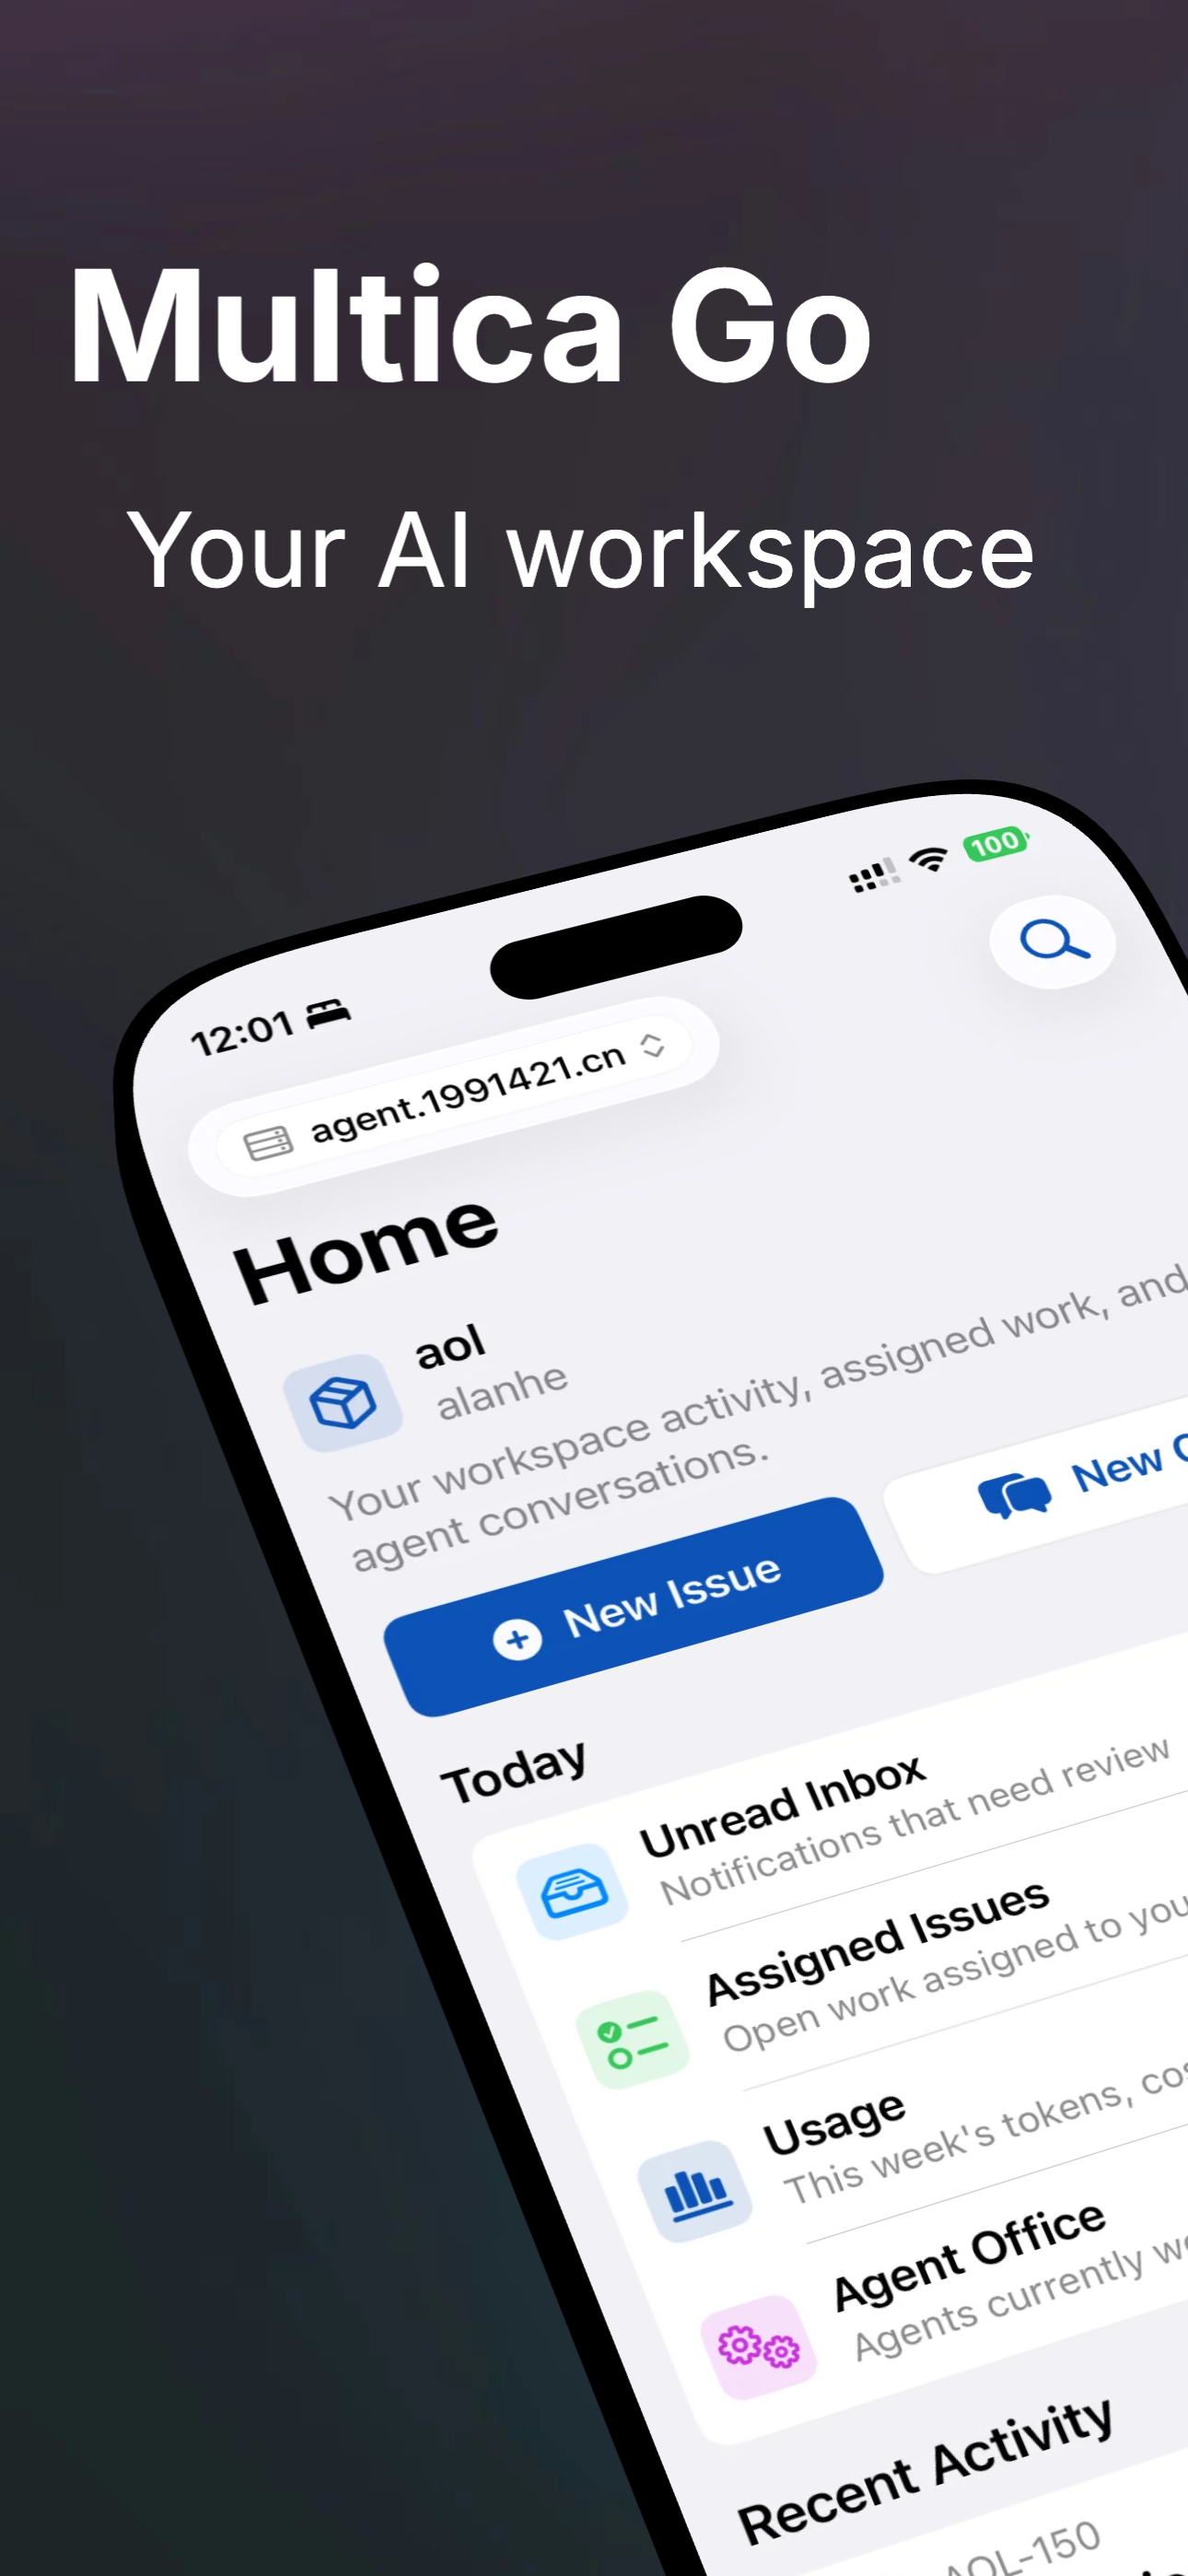
What Is Multica? Why I Built an iOS Client Called Multica Go
Multica is an open-source Managed Agents platform that turns coding agents such as Claude Code and Codex into real …
How to Apply for a Fiat24 Card Before Mainland China Signups Close
On Friday, I saw someone in the community mention that Fiat24 card applications were about to close. Since this is an …
Using opencode
Some AI services don’t have their own CLI tools. For convenience, you can use a unified CLI terminal, such as opencode. …
What Is Multica? Multi-Agent Collaboration Platform Guide
I have been using Multica more recently. This article records what I currently know and understand about Multica.
Why img onerror Doesn't Trigger on HTTP 404: A Common Pitfall
The img element has an onerror event, which in theory fires when an image fails to load. Recently, however, I ran into …
Trezor Hardware Wallet: Firmware, Emulator, and Custom Firmware Notes
imKey does not support flashing custom firmware, so our team looked into another hardware wallet brand: Trezor. I am …
imKey Hardware Wallet: Signing, Firmware, and MetaMask Support
One drawback of Ledger for development is that communication with the official team can be inefficient, so we …
Cloudflare Tips: Practical Notes From Heavy Daily Use
Cloudflare has become one of the tools I use heavily. Its free tier already includes a lot, and it is powerful enough …
Issues Encountered When Sideloading Ledger Device Apps on Emulator and Real Device
Ledger is arguably the No.1 in the hardware wallet niche, but I still ran into quite a few issues during actual use - …
China Website ICP Filing: Domain, Server, and Practical Notes
Does ICP Filing Follow the Domain or the Server?
How to Register a Nigeria or Turkey Apple ID to Save on Subscriptions
Who This Guide Is For This guide is for people who need a Nigerian or Turkish Apple ID for region-exclusive apps or …
How to Register an Apple ID in Nigeria or Turkey
To save on AI subscription costs, I’ve been using low-price region App Store subscriptions in Turkey or Nigeria. …
How to Use Exa AI Search with Claude MCP
Most AI tools now have web search capabilities. For example, Claude Code can use online search, and when the AI …
Best China AI Models and Low-Cost AI Options to Consider
OpenClaw has been popular for a while. Also, because of network access and pricing, using OpenAI/Claude has a certain …
Applying for a South Korea Visa
On March 30th, South Korea relaxed the requirements for its 10-year visa and simplified the required documents for …
How to Apply for a South Korea Visa in Beijing: Documents, Cost, and Timeline
On March 30, South Korea relaxed the requirements for 10-year visas, and the document requirements were simplified for …
Git History Making Your Repository Too Large
I recently needed to push an open-source project to a community repository, but it reported that the repo was too large …
How to Fix an Oversized Git Repository Caused by Commit History
I recently needed to push an open-source project to the community, but the repository was reported as too large, …
Understanding OneKey Hardware Wallets
I recently needed to research hardware wallets for work. After looking at Ledger, I also wanted to understand OneKey, …
Twitter Card Sharing Configuration
I often share blog content on Twitter/X, both for pure sharing and personal promotion. Sometimes I notice that blog …

Understanding Ledger Hardware Wallets
Ledger /'ledʒər/ is a hardware wallet brand. I recently needed to verify the signing flow for a new blockchain, so I …
Personal AI MCP Tools I Use and How to Install Them
MCP (Model Context Protocol) is a protocol that allows AI to connect to external tools and data sources. In practice, …